Saturday, November 28, 2009

Here it's called Stuffing, Back Home it was called Bread Poha

Before we move to today's recipe....what is this Fruit or Vegetable ???

Now for the recipe, nope it's not using the produce from the above pic, but it's the recipe from our thanksgiving dinner, something so important that you can't think of having a turkey dinner without it....it's stuffing.

It's typically made with bread croutons, some veggies, nuts & dry fruits. You can either fill the big bird with it (which I don't like) or another popular way is you cook it separately and serve it as side dish (it's called dressing when cooked separately). This time when I cooked bread stuffing, it reminded me of bread poha my Mom makes with lots of veggies & nuts, though it's not exactly same but has many similarities. I ate the leftovers for the next day breakfast & loved it.

Ingredients :

  • 2 cups bread croutons(check notes for making your own)
  • 1/2 cup chopped carrots
  • 1/2 cup chopped celery
  • 1/2 cup chopped granny smith apple
  • 1/4 cup or more roasted & chopped almonds & walnuts
  • 1/4 cup chopped apricots
  • 1/4 cup raisins plus dried cranberries
  • 2 Tblsp. of unsalted butter (or U can use all evoo instead)
  • 2 Tblsp. of evoo(extra virgin olive oil (or you can use all butter instead)
  • 1 Tblsp. of evoo for sauteing the vegetables
  • 1/2 cup of vegetable stock or water ( I used turkey stock)
  • salt as per taste
  • black pepper as per taste
  • 1 tsp. dried parsley

Method :

  1. Heat butter & oil in a big heavy bottom pan. Add bread croutons to it & toss them to get coating of butter. Cook them on a med. heat for about 5-7 minutes, stir them in between. When they start to turn brown, take them out of the pan. If you don't have big pan do it in two batches using 1 spoon of butter & oil each, for each batch of croutons

  2. In the same pan heat 1 Tblsp. of evoo & add celery, carrots & apples. Cover and cook them till they get soft, if needed add little stock or water at a time.

  3. Once the veggies are soft add croutons, nuts & dry fruits. Also add salt, black pepper and parsley. Mix everything & add 1/2 cup of stock/water. cover & cook for couple of minutes.

  4. Turn of the gas. Let it sit for sometime before serving.

  5. This can be served as a side dish or can also be eaten as a snack or breakfast by itself. You can also top it with fresh cilantro(instead of parsley) & sprinkle some lemon/lime juice before serving. If you like you can also add other veggies like peas, bell pepper, green beans etc.. My mom makes bread poha version with some tomatoes in it.

Note : to make your own croutons, take 5 slices of 2-3 day old bread, preferably french bread or any hardy bread. I use whatever kind I have at home. This time I used multi grain bread. Cut the slices into 4 stripes & then further cut each strip into 4 pieces. Spread them onto cookie sheet & toast in the oven 350 degree F for roughly 10 min. or so. Shake them in between, once they turn crispy they are done. Remember if croutons are not crispy stuffing will turn mushy.

For Vegan version instead of butter evoo can be used.

This dish is quite healthy as I used multi grain bread to make croutons plus it has lots of veggies, nuts & dry fruits. Specially with all the other flavours going on kids can't figure out that it has multi grain bread in it(so no complaints). I'm sending this to WYF-Speciality event as I cooked it specially for Thanksgiving dinner and I'm also sending it to Yasmeen's HealthNut Challenge-3 : Healing Foods as it contains all the healthy ingredients from carrots to apples & almonds to cranberries. Last but not the least it goes to Radhika & Sudeshna's Food for 7 stages of life : Kids Event.

And yes, before I sign off did you guys guessed what the name of the fruit in above pic is. It's persimmon, known to the ancient Greeks as "fruits of the Gods". Saw it in the local Chinese farmer market, there were two varieties, one was sold in the pack of 6 or 8 that looked more like round tomatoes. The one I got was sold loose, so I got just one to taste, later checked on the wiki it's called "Hachiya". It was too(when I say too I really mean tooooooo) sweet, pulp inside had similar texture like ripe mango pulp but it was too sweet (we, in fact he only ate one bite, ate it just raw) may be I should have made milk shake with it.

Friday, November 27, 2009

Happy Thanksgiving - Turkey Dinner

Hope you all had a nice & wonderful Thanksgiving with your family & friends. Here's what we had......"Tandoori Turkey" with orange-pineapple sauce with side of creamy Au Gratin Potatoes & nutty, fruity stuffing. No recipes today only some pics.


Tuesday, November 24, 2009

Mirchi,Mirchi & more Mirchi


"If life throws you a lemon - make lemonade"


--Joan Collins

But what if DH gets you almost 1 and a 1/2 pound of hot green peppers(Thai chilli peppers) ?? Of course, you make aachar(pickle) and get your daily dose of vitamin C, B, Potassium, Magnesium & Iron from it(Note : this is totally my idea of getting these vitamins thru pepper pickle, do not take this thing into regular practise, heat of peppers may trouble your whole body system in various ways).To get info about medicinal value, culinary & other usages of chili peppers click here.

So, it's raining Mirchi achar(chille/pepper pickle) in my house, I have made 3 different kind still I have enough supply of mirchis(pepper) for another week or so. The kind of pickles I made are quick & instant kind.

Mirchi Achar #1 : Tiranga Achar

This first one is really easy one, no oil needed. Also you can increase or decrease any of the main ingredient as per your taste or availability of ingredients.

Ingredients :
  • half cup each green chilli peppers, fresh ginger, fresh turmeric
  • juice of 1 lime (or more if it's not very juicy or if they are small variety
  • salt as per taste( I used approximately 1&1/4 tsp. for above quantity)
Method :

Peel ginger & turmeric, wash everything & dry it thoroughly, spread it on kitchen towel or paper towel & let it air dry for sometime or just pat dry it. Now, julienne ginger & turmeric & cut peppers length wise. Put it in a clean glass/steel bowl, sprinkle salt & squeeze lime juice on it using a clean dry spoon mix everything & transfer it to clean dry glass jar. It's ready to eat kind of aachar, I usually keep it in the fridge after a day b'coz we r using limited salt & no oil. Give it a shake once in a while. And if ginger is really fresh & young, it'll turn to very pretty pink color after couple of hours or so. As this pickle taste & stays good when it's fresh, say for a week or so, so don't make big batch of this. Here's a picture of fresh turmeric.

As all the ingredients in this pickle chillis, ginger & turmeric are cosidered as health food, I would like to send it to Yasmeen's Health Nut Challenge 3 - Healing foods. And as one of the main ingredient is turmeric so it also goes to "Think Spice : Think Turmeric" event hosted by sudeshna and brainchild of Sunita from sunita's world.

As for the benefits:

Turmeric is a natural anti-inflammatory, anti-septic & anti-bacterial agent helps in disinfecting cuts & burns.Natural lever detoxifier, natural pain-killer,used in the treatment of arthritis, may prevent & slow the process of Alzheimer's disease. These are only few of it's benefits for more click here.

Ginger helps in morning sickness, cold & flu prevention & treatment, heart burn, menstrual cramps & also believe to have anti-cancer properties.For more info click here.

Note : While working with fresh turmeric you might want to use disposable gloves(food safe variety) as it will turn your hands & work surface yellow, when you work with it.

Also if your hands are sensitive to pepper heat, it's advisable to use gloves while cutting them.

If you decide to leave peppers out of the recipe, you can add 1 tsp. of red chilli powder.

Mirchi ka Aachar(Chilli Pepper Pickle) # 2This is hot one. What you need is wash & dry 1 cup of green chillies & slit them lengthwise & then chop them into 1/2 inch pieces. We don't want big pieces as we are not filling the spice mixture into the chillies. Keep them aside.

Now in a pan heat 1 tblsp. of mustard or vegetable or canola oil. Turn the gas off & add chopped chillies, salt(as per taste, I used around 1& 1/4 tsp.) & coarsely ground 2 tsp. of achar masala(spice mix). Mix everything so the chillies get coating of spice mix. Once it's cool transfer it to clean dry glass jar, shake it once in a while. It's ready to eat but better if you let it sit for a day or so.

For acharMasala(Pickle spice mix) : take equal quantities of mustard seeds, fennel seeds(saunf), fenugreek seeds(methidana), cumin(jeera) & half quantity of onion seeds(kalonji). Dry roast them for a min. or so let them cool add little bit of turmeric(haldi). Grind it & keep it in air tight jar for later use. We are not using any chilli powder as the chilli peppers are really hot.

Note : These are instant kind of pickles not meant to keep for long time, as we are not using excessive salt or sugar or oil or vinegar or lime juices, these things works as preservative for pickles. So I suggest to keep these pickles in the fridge after a day or so of making.

Also never use wet spoon in the jar to take the pickle & always keep pickles in non-reactive utensil(like steel or glass) with the lid closed tightly.

I didn't took the picture of third kind, so whenever I make the next batch I'm gonna post that.

Monday, November 23, 2009

Cranberry Chutney or Sauce - Part 2 also an Update for previous post

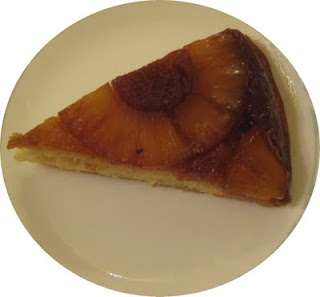
Update on Pineapple upside down Cake : Finally I managed to upload the pics, and also I realized that I didn't took the picture of whole cake, I told you, I love this cake so much that only thing I can think of, while sitting in front of this cake is EATING IT. But I surely got some pictures of the whole process, though they are not very clear, but I wanted to share with you all. Also one more thing DH thinks I used too much sugar for caramel but to me it was perfect specially when eaten with whip cream(point to be noted I made that cake for me, after a long time), so I guess sugar for caramel can be further reduced to 3 tblsp. One more thing I wanted to add for vegan version soy butter can be used instead of regular one.
Now let's come to today's post Cranberry chutney/sauce/salsa or whatever you like to call it.
This is my second cranberry chutney, I think it's more like salsa. As I wrote in my previous post the first chutney I made was good but had lot of sugar b'coz of sourness of berries, so I came up with this more healthy option by adding 2 apples to it(so I can eat as much as I want, without any guilty). Apples I used were quite sweet, so try to use sweet varieties, that way you can cut the sugar out of this recipe.Now, little bit on health benefits of these berries(this info is collected from web), some common ones are :

1) treating UTI(urinary tract infections)
2)reduction of Dental Plague
3)anti-cancer activity
4)reducing the risk of heart disease
5)preventing the development of kidney stones
6) provide relief for asthma patients

Now the recipe.

Ingredients :
  • half med. size onion chopped
  • 2 apples peeled & chopped( i used red delicious)
  • 1/2 lb. fresh cranberries(that's half bag)
  • 1 tblsp. sugar
  • salt as per taste
  • black pepper as per taste(optional)
  • red chilli powder 1 tsp.(can be left out if making for kids)
  • garam masala 1 tsp.
  • ginger 2 tblsp. freshly grated
  • water/apple juice 4 oz. or more
  • little oil

Method :

Heat little oil in a heavy bottom pan, saute onions for 2 min. or so then add rest of the ingredients. At this point only add 4 oz. of water. Mix everything together, cover & let it cook on med. for around 15 min., stir in between.

Add more water according to the consistency you like, I kept this one little loose like salsa kind. Once the apple & cranberries are cooked(they'll be mushy) it's done.

Serve it with with your choice of bread, roti, rice, as chips dip or as a sauce for grilled meat or seafood. I enjoyed it eating just like that, with nothing.So, go and grab these fresh berries before they disappear from store shelfs. As for me, I'm gonna make little extra this time & try to freeze it for later use.

It's very healthy for kids also, with only 1 tblsp. of sugar, which infact can be replaced by honey also. Kids will surely like this fruit sauce, tangy & sweet. I would like to send this recipe to :

1) Radhika & Sudeshna's Food for 7 Stages of Life - Kids(4-14 yrs.) .

2) Yasmeen's Helath Nut Challenge 3 : Healing foods .

3) Sharmi's CFK- Veggies & Fruits.

4) On Sanghi's suggestion I'm sending this cranberry chutney as well as Pineapple upside down cake for her FIL-Fruits event. I'm dedicating the cake to my DD as I love to bake for her, she love cakes and specially after eating this one she said this is the most tasty & soft vanilla cake she ever ate. And as far the cranberry chutney is concerned I dedicate it to my Mom who's the inspiration behind my cooking.

Saturday, November 21, 2009

Pineapple Upside Down Cake - Cake to indulge on

For me it's comfort food - gooey & good, I'm happy to eat it all without sharing it. No one for exact knows it's origin but it's All-American - a classic dessert, invented somewhere around the beg. of 1900's, many a times cooked on the stove top in cast iron skillet or in the oven just like any other cake. But it's served upside down so all the caramel rich pineapple comes on the top. No need to decorate this cake, you only need fresh whip cream with it.

Gooey, sweet caramelized upside down pineapple cake + fresh whip cream = HEAVEN.

It really tastes good, though it may look like little delicate to make but it's really easy.I would like to send this cake to Radhika's cook for yourself event, as her first blog anniversary celebration, once again Congrats dear.

Sorry no-photos in this post as I'm not able to upload the pictures, will post with next one.
Ingredients :
  • 1 recipe vanilla cake batter of your choice(for 8" pan)
  • 2 tblsp. butter
  • 5 tblsp. brown sugar
  • 5 pineapple rings( I used dole canned pineapple sliced into rings)

Method :

Heat cast-iron skillet on med. heat. For caramel heat butter add sugar & stir it. Cook it over medium heat till mixture get bubbly than arrange pineapple rings in it. I arranged 3 whole rings & cut rest 2 into quarters & fill the area which was empty.Cook for 2 min. or so then flip them and cook for 1 min. & turn the gas off let it cool little bit.

Now add cake batter on top of it & cook for 25-30 minute on 350 degree F oven. Once done let it stay in the pan for 5-7 min. after that invert it onto the cake plate. For that just put the plate on top of the pan & invert the pan & take the pan & cake is ready. Best served warm with some fresh whip cream.

Note : as we are using sugar to caramelize the fruit, I suggest to reduce the amount of sugar in the cake batter. I used half, of the required according to the recipe and it was perfect with lightly sweet cream.

Variations : Other fruits like apples, pears or peaches(firm one) can also be used. If you don't have cast iron skillet, use regular cake pan but prepare the caramel sauce & fruit in any heavy bottom pan & then transfer it to prepared cake tin & top it with cake batter.

Thursday, November 19, 2009

Karonde ki chutney using cranberries

Does it happen to you, somebody talked about some food and now you want to try your hands on it, well it happens to me quite often. In august one of my friend talked about how she makes chutney using cranberries which taste similar to karonde ki chutney.....So I said o.k let the fresh cranberries season come & I'll bother you then. Now, Almost 5 weeks back in wallmart I saw the guy putting cranberries on the shelf and I had to buy. So here I was with cranberries sitting in my fridge, no clue what to do with them, my MIL makes yummy karonda chutney, but she was on some trip....I tried to contact this friend but couldn't get hold of her...time passed(fast forward) nearly 3 weeks(on the pack it says....stays fresh for up to 4 weeks...so I tested that & it's true....). Fast forward 3 more days, no more waiting I had to do something with those berries, I know what you guys are thinking, Google to the rescue, No thanks, last time I googled for something & I ended up making Bagels. So, finally I went to the kitchen & started with my regular recipe I use for making fruit chutney's but with little twist here & there as these berries are quite sour. So here's the recipe, feel free to adjust the measurements according to your taste buds.

Ingredients :
  • 1/2 pound fresh cranberries( that's half bag)
  • 2-3 red chillies
  • 1 tsp. panch puran (it's a whole spice mix : fenugreek, mustard, kalonji, cumin & fennel)
  • salt as per taste
  • black pepper as per taste
  • paprika 1 tsp.
  • 1 Tblsp. freshly grated ginger
  • around 1/3 cup sugar(I started with 1/4 cup then tasted it little bit & add more acc. to your taste)
  • little oil
  • water as needed

Method :

  1. Heat heavy bottom pan, heat oil add red chillies & panch puran, when seeds start to splutter add cranberries, mix them.

  2. They will leave some water, add salt, pepper, sugar & ginger, mix everything. Cover & cook on med. heat for roughly 15 min. or so.

  3. Keep stirring it now & then and if getting too dry add a splash of water

  4. Taste a little bit to check the flavours if needed add more sugar.

Note : I kept this chutney of little thick consistency, adjust it acc. to your choice. I kept it in the fridge, tasted good even after a week. Serve it with roti or spread it on the toast. It was really yummy & easy but uses a lot of sugar so I had to come up with something which I can eat without any guilt, just with the spoon & nothing else.Do check out my next post for the other version.

Wednesday, November 18, 2009

Roti - Indian Flatbread

Roti, chapati or as we call in our house phulka(literally meaning which has been inflated), is the basic Indian bread and is a staple food of North India, though it's also been eaten in other parts of India but in northern India it's basically part of every meal. Roti is generally defined as Indian flat bread made with whole wheat flour(atta). No rising agents are used for the dough as roti is unleavened flat bread. Unlike bread, roti is usually eaten fresh, when I say fresh that means dough can be prepare in advance kept in the fridge & at the time of lunch/dinner roti is rolled & cooked. But if you have any leftovers of roti they really taste good with acchar(pickle) or chutney or just put some cooked dry veggie on it & roll it like burrito.....nothing can match that taste.

When one of the fellow blogger asked me if I'm gonna do post on roti, I thought that's simple, but wait a minute, it's simplicity itself is main difficulty here....it's so simple & basic that we never measure the flour or water portions for this, everything is eyeballed. Whenever I finish with one batch of dough I knead next batch, no matter what, roti dough is always there in the fridge.

Roti can be eaten with cooked dry vegetables called subzi, lentils or with gravies vegetarian as well as non-vegetarian & also with seafood.

Here's the recipe for roti/chapati/phulka, I tried my best but I think for a person who's never seen roti specially the process of making it, first time it might be little difficult.

Ingredient :

For dough :
  1. whole wheat flour 1 & 1/2 cup (I use Laxmi brand chapati flour available at Indian grocery store)
  2. water at room temperature around 1/2 cup
  3. salt 1 tsp. (optional)

For roti :

  1. x'tra wheat flour(around 1/2 cup or so) needed for rolling the roti.
  2. rolling pin
  3. any flat & smooth surface to roll the roti (you can use clean counter top surface)
  4. Tawa(flat griddle), preferably cast iron or non-stick pan will also do.
  5. ghee(clarified butter) or butter can be used

Method :

For Dough :

1) Take 1 & half cup of flour, salt(if using) add little water, using your hand mix them, add little bit more water & mix it again. Never put all the water in one time, always put little at a time, when all the flour comes together, just wet your hand when needed & make one big ball of the flour.

2) Now knead it for around 2 min. or so using the back side of your fist. It'll be little sticky in the beginning. Now just cover it with either a damp cloth or with some bowl.

3) Let it rest for roughly 10 min. After resting time knead the dough for 2-3 minutes, this time it will be very smooth. Once done take 2-3 drops of oil on your hand & roll the dough ball in it. Keep it in a bowl with tight lid on it in the fridge.

4) Take the dough out of the fridge at least 10 min. prior to making roti.

Note : Roti dough is not very loose or tight dough, it's soft dough. In case if u find it's difficult to handle you can always add little more water or dry flour to get the right consistency. Every time you make the dough water quantity may vary little bit, due to temperature, different flour brands etc..

This dough can be kept in the fridge for upto 2 days or even more but it's best to use within 2 days.

To make soft rotis(specially for the kids) instead of water milk can be used, but then dough should be used within a day or so. Another option is to use around 1 tblsp. of cooking oil alongwith water.

Making Roti :

1) Heat griddle/pan on med. high. Put x'tra flour in some flat plate or bowl, big enough to hold the rolled roti(approximately 6-8" in diameter).

2) Take a little dough(little bigger then ping pong ball) roll it in your hand like a ball. Now roll it into x'tra dry flour, gently shake it to get rid of x'tra flour.

3) Put it onto the flat surface & roll it(around 3" in size) using the rolling pin,

4) Take the rolled roti turn it 90 degree & again roll it till u get around 7" or so, whenever you feel it's getting sticky gently pick it up put it on the flour plate & again back to rolling surface & roll it. It's not that difficult as it sounds and don't worry if in the beginning you can't get exact round....I have made few, actually lots of international maps when I started to make rotis. Only a little bit of practice & lots of patience.

5) To check if griddle is hot or not, keep your hands 2" away(on top side) from the pan/griddle, if it's hot enough you can feel it, you won't be able to keep your hand there for long time.

6) Now put the rolled roti on it, after around 35-40 seconds turn it upside down. Again after 35-40 sec. turn it back, this time you will see from some spots it's puffing up. Using kitchen towel u can gently press at the spots it's not puffing & soon it will start to puff up, now again turn it upside down for 7-8 seconds, if you are not comfortable using kitchen towel as hot air sometime directly blow on your hands, it's better to use spatula. Take it off the pan.

7) Apply ghee/butter. Eat fresh with Subji(cooked veggies), dal(lentils) or your favourite non-veg dish.

Note: If you want to make them ahead of time in that case line a heavy duty foil with a kitchen towel & keep your rotis inside that. You can also directly puff the roti's on the direct flame, but might be little tricky for the beginners.

To make it totally fat free and vegan ghee can be left out.