Showing posts with label Kids. Show all posts

Wednesday, May 9, 2012

It's Pink......It's not a food.....I made it

Only 3 yr. & 6 months late....call me lazy or real life mom. Back in the summer of 2008 I started this quilt when I was pregnant with my second daughter. Bur never get to complete it on time and once she came, life started getting busy & busy only.

My crafter friends would know once U leave the project in between how hard it can be to finish. But, finally I managed to complete it just on time for her 3&1/2 yr. b'day, that's today. 


It's special because it's for my little princess, even if it's late she can still fit in it.....every time she saw me working on it in past few months she was so happy to know that it's for her.....and could not hold her excitement & hug me saying "thank you mumma.....it's for my b'day"......another reason for it being special......It's my first quilt. Quilts always fascinates me, now, finally I can also say I have made one and that too all by myself....it's totally handmade..... from cutting squares to sewing them together and quilting all the layers together and finally finishing off with pink edging.....totally handmade. 

Monday, April 30, 2012

It's Easy....It's Colorful....It's Dessert....It's Wiggly too...


If you guessed Jello....you are right......a dessert is wiggly if it's made out of gelatin or in this part of the world more commonly known as Jello, no matter what U do it's gonna wiggle. First of all let me clear one thing, it's easy as it's no cooking required dessert other then boiling water BUT it's a time consuming process. If U gonna do all the layers it will take U approximately 2 hours(at least 75% of the time is waiting period, but U need to be around, as this waiting period is divided into several 10-15 minute periods ) but end result is so cute looking, nothing less then an art work.  Kids gonna love it but adults also won't say no to it. Last week few weeks few months back(I'm lazy but finally I've completed the post :) ) while blog hopping I found this blog and she have this cute collection of jello creations that first look at this picture & I knew it, I'll be making it soon. You really have to look at her pictures as they are so neat& clean, in my case bottom layer stuck a little bit but hers are so impressive.

It's a simple recipe, not even a recipe in fact a procedure. I'm only giving the recipe here because I cut it down to half as I knew it's gonna be lot of jello for our family. So, instead of 9x13 dish I made it in 8 inch square Pyrex dish. Now, as I divided the recipe, I did a lot of measuring :) & somewhere I believe went little wrong(may be the dish size or eye balling the half can of condensed milk) so my milk layer was not very thick, but nothing to hold U back from picking that master piece to eat.....

Note : It was still a lot of Jello for our family of 4, but good thing is it can be kept in the fridge and it taste good even after 3-4 days. It's good dessert for a party, U can make it ahead of time and impress your guests with your artwork.

Note directly from the original recipe source : Please make sure you have a level refrigerator!
Click here for Original recipe.

What I used :

  • 1 - 3 oz. pack of  Red Jello, divided in two equal parts
  • 1 - 3 oz. pack of  Blue Jello, divided in two equal parts
  • 1/2 can of Condensed milk
  • 2 packets of unflavoured gelatin(I use Knox brand)
  • Boiling water
  • 5 small bowls ( or use 2 & U can wash & dry one after each Jello layer)
Note : 1 pack of Unflavoured gelatin is needed to be divided in 4 parts. 1 pack is around 2&1/4 tsp. so I simply used 1/2 tsp. every time in each jello layer.

What I did :

Jello Layer :
  1. Mix one half (1.5 ounce) package of Jello with 1/4 package of Knox. (see the note above).
  2. Add half cup boiling water and stir to dissolve.
  3. Cool to room temperature and pour into dish(8 inch square Pyrex dish).
  4. Refrigerate 15 minutes until solid enough for next layer.
Milk Layer:
  1. In a large bowl, mix half can sweetened condensed milk with half cup boiling water.
  2. In a small bowl, place 1/4 cup cold water. Sprinkle 1 package of  unflavored gelatin on the water. Allow to sit for a 2-3 minutes for gelatin to bloom. Add 1/4 cup boiling water to dissolve the gelatin.
  3. Combine the dissolved gelatin with the milk mixture. 
  4. Now, the milk mixture is ready again we gonna use it in 3 equal parts, total mixture is around one & a half cup.
  5. Once cool to room temperature  pour half a cup over the Jello mixture(which was set in the fridge). Refrigerate 15 minutes until solid enough for next layer.
  • Repeat Jello and Milk layers (starting and ending with Jello)
  • Refrigerate little longer after final layer to make sure that Jello is fully set and cut into desired shapes.

IF you don't want to spend this much time, here's a simple version I usually do from long time back(in fact this pic is also from my initial days of blogging). I always love to do it with fresh fruits but U can certainly do it without any fruits.

Monday, February 13, 2012

Heart Healthy, Valentine's Day Pancake : with Whole Grains, Almond & Eggless too


You read it right Valentine's Day Pancake. Valentine's Day is all about your loved ones. And on a food blog what can be better than heart healthy food to show your loved ones that U not only love them but care for their heart too. Back in DEC. 2009 I posted egg less pancake in this blog & that is fourth most popular post on this blog. That time I use to use store bought Pancake Mix & fortify it with some healthy stuff  from my kitchen, but that was the last box of store bought pancake mix I bought. No, my kids didn't stopped eating pancakes it's just that I started making my own mix. I started with all purpose flour based & now from almost last one year we are having totally whole grain pancakes with few other good stuff thrown in and these are egg less too. And no more non-stick pans too.

What I used :
For Pancakes :
  • 1/3 cup whole wheat flour(I use regular atta, staple in Indian kitchen)
  • 1/3 cup oatmeal/oat flour (grind regular oats using coffee grinder)
  • 1/3 cup almond meal/flour (use coffee/spice grinder to turn almonds into flour)
  • pinch of cinnamon powder
  • 1/4 tsp. baking soda
  • 3/4 cup / 6 oz. buttermilk *(see notes)
  • 1/4 cup / 2 oz. water
optional *(see notes):
  • 1 TBSP. ground flax seeds
  • 1 TBSP. wheat germ
Toppings & Syrup :
  • 7-8 strawberries
  • 1/2 TBSP. of regular sugar
  • 1 TBSP. of slivered almonds
  • maple syrup or honey
Notes :
  1. I do not always use buttermilk, most of the time I use home made curd/dahi/yogurt as that is always available in my fridge. I thin it out with some water to get the consistency of buttermilk.
  2. If using flax meal & wheat germ, I always add them to the ready batter at the last moment only as I notice if I add them before the batter resting period, it makes the batter little starchy/gooey. I tried to use it as egg substitute here in this recipe but outcome wasn't welcomed by my kids.
  3. To make these pancakes egg less I use combination of buttermilk & baking soda. Though I'm using flax meal also which is a good egg substitute but I'm not using it as egg replacer instead just to add some more nutrients.

what I did :
  1. Wash, hull, dry & slice the strawberries. Put them in a bowl & sprinkle 1/2 tbsp. of sugar on them,U can use more if berries are more on tart side or if U like more sweet. Gently toss them. Keep aside. This simple step of macerating strawberries really bring out the flavours and add a special touch to otherwise routine breakfast of pancakes. U can also use other flavours like orange juice or balsamic vinegar to macerate the strawberries.
  2. In a big bowl, mix cinnamon powder & all the three flours we r using for pancake. I like to use whisk here. Add liquids(buttermilk & water) to the flour mixture & whisk them together. Let it sit for 5-10 minutes.
  3. When ready to cook heat a cast iron skillet on no more then medium heat.
  4. Add baking soda & if using optional items( wheat germ & flax meal) add them. Gently mix adjust the consistency of the batter. In case if u r using flax meal & wheat germ chances are U will need little extra liquid.
  5. Put few drops of oil on the skillet & pour a ladle full of batter, using the backside of ladle gently swirl it around in round shape.
  6. Cook on med. heat. When turns little brown on the bottom side flip the side & let it cook on the other side around 40-50 sec. on each side. Do not press on the pancake with spatula while they r cooking on the other side.
  7. To serve put some strawberries with their juice on top of the pancake, top it with maple syrup or honey and finally sprinkle some slivered almonds.
Please, do not spoil all your efforts for making it so healthy by using store bought pancake syrups, they are full of high fructose corn syrup. If U like the syrup make your own. Mix together 1 part honey with 2 part water & boil it, turn the heat to slow & let it reduce little bit. Serve it when it's cool. If planning to serve with Syrup make sure U make it before hand so that when U are ready to dig into your warm pancakes, syrup is also ready for U.
Note : these are not very fluffy kind but still very good and melt in the mouth kind pancakes and no need to mention totally Heart Healthy. As per my experience if I'm planning to make regular fluffy kind pancakes I usually replace half of whole wheat flour & oat meal with all purpose flour & also add a tiny pinch of baking soda in addition to the regular amount I'm using.

These pancakes are not only perfect for breakfast but occassionaly my kids love to have them for dinner too, with a cup of warm milk. To surprise your kids this valentine's day U  can also pack them for lunch, just use medium size heart shape cookie cutter to cut a big pancake into bite size hearts. Pack some honey in a small container & some macerated strawberries in another. Don't forget to pack a fork to eat them with.

And a special note to tell them how much U love them, not only today but always & O'course don't forget to mention the magic words for the day "Happy Valentine's Day".Hope U all have nice one.

Wednesday, March 30, 2011

Eggless Baking : Chocolate Applesauce Muffin for breakfast on a very Crucial Day

Importance of today's Cricket Match(march/30/2011) : it's a crucial match, SEMI-FINAL for WORLD CUP & played between two Cricket Crazy Nations India and Pakistan, lots of emotions and politics goes in this. Lots of pressure on both the team all important leaders including Prime Ministers of both countries are watching it.

Last Match Day(March/24/2011) : scene from my house explained here in my previous post.
Today (March/25/2011) : my day started at little before 6 A.M.....he's again missing from the bed, I can hear some voices coming from the other part of the house, but this time I'm lazily staying in the bed for a while & finally decided to come out & here goes our conversation....

me : what's the score
he : 77 for ?? balls(he did told me exact balls but i don't remember it now when I'm typing it after 45 minutes), run rate is very good 7.??(again I forgot)
me : kaun khel raha hai???(which team is playing)....do u want chai(tea)???
he : India, aab chup ho ja yaar bara sahi match chal raha hai.....(Please be quite now honey, it's very good match going on, (remember in the last post he called me honey...well in hindi the way we talk, yaar would come in the category of honey only)

after sometime....
me : in Delhi roads must be quite right now...my brother told me in many neighbourhoods large T.V screens have been installed & it's kind of a holiday.
he(no talking) : picked up the phone, called his Dad.....sharing some cricket talk
me(no talking) : started working on my post.....I tried to open multiple pages &
he : kya yaar(honey) what r u doing it's slowing down my match here(we r watching it on Internet)....can't U work on one page only.....

after some time he went to do his brush & OMG!! Pakistan took 3rd Indian wicket(Kohli)....run rate is also 5.57 & another sad news Yuvraj got out on his first ball :-((.....I ran towards him almost screaming, came back quickly........now comes Dhoni & that reminds me of a movie I saw last month "HATRICK" it's a bollywood movie(it's interesting movie to see, if you haven't seen) showing how cricket plays an important role in different peoples life and commentator is also talking if it's gonna be a HATRICK ball....means 3 players out in 3 continuous balls...but thank god...NO it's not....

he was out of the room when 2 above players got out.....
he : kya yaar I just went out aur do wickets chale gaye(I was out for a minute & 2 players out what??)
me : U sit here & U r not moving out of this area.....Oh Yes! we Indians do have lot of superstitions when it comes to CRICKET.

After few minutes he went to the kitchen to make tea for himself.....& I hear Pakistani team cheering....No..No...NO, not because my husband is making tea for himself....but because....
me: OMG!!!! sachin gaya
he : are nahi yaar(no), catch miss ho gayi....sachin is saved 3rd time....
me : U come back, right now....sit on this chair, don't go anywhere(remember superstitions).....I'll make tea, U want it with ginger...

SCORE : 185/4 (time : 7:37 A.M EST U.S.A)

Just in case if U guys are thinking that don't they have anything else to do...so for the records, I'm usually not this crazy or in fact not crazy at all for sports but it's India Vs Pakistan....U can't miss this.....this time hubby dear is lucky as he had some odd hour(midnight) official stuff going on with his companies international offices and again some meetings lined up in the morning so he's working from home & it was all set on Monday only so no guessing work for me.....I told Kiddo to buy lunch from school, for snack she's taking home made applesauce.
For breakfast I made some Eggless, Low fat, whole wheat applesauce cupcakes/muffins yesterday only, and yes  chocolate flavour.....they are good at their own, use of applesauce & vinegar make them soft from inside but I suggest having them with some tea/coffee or milk as they are low in fat and also half of the flour is whole wheat, which makes them little dry. It's a healthy & tasty treat, perfect for breakfast.

What I used :
Dry Ingredients :
  • 3/4 cup unbleached all purpose flour
  • 3/4 cup atta(wholewheat flour)
  • 4 tablespoon cocoa powder
  • 2 tsp. baking powder
  • 1/2 tsp. baking soda
  • 1 tsp. cinnamon powder
  • pinch of salt
Wet Ingredients :
  • 2 tablespoon unsalted butter (at room temperature)
  • 1 cup unsweetened applesauce(recipe here but now I pressure cook, one whistle on low)
  • 1/4 cup dark brown sugar
  • 1/4 cup regular sugar
  • 3/4 cup + 2 tablespoon of milk
 Other Ingredients
  • 1/2 tablespoon apple cider vinegar(regular kind can be used)
  • 1 tsp. vanilla
quick Info : India done with their turn.....target set for other team :261 runs, fingers crossed as this is not a very high target for the opposite team......time for break....hubby dear is lucky today as India's turn got over just 5 minutes before his meeting start....

What I did for muffins :
  1. Sift together all the dry ingredients.
  2. In another bowl mix all the wet ingredients
  3. Add dry ingredients to wet in 3-4 parts, mixing thoroughly making sure no lumps are there, I prefer to use whisk her(manual to electronic mixer).
  4. Add vinegar & vanilla.Mix.
  5. Fill in the prepared pans. Bake at 350 degree.
  6. This batter should yield U 12 regular size muffins, but I could not decide which pan to bake them in as I wanted mini muffins but batter was more then I needed for them, so here's what I baked from this batter:  12 mini muffins, baked for 14 minutes . 6 regular size muffins, baked for 17 minutes. 1 small 4 inch round cake, baked for 24 minutes.
  7. Once they were cool I brushed them with melted butter & decked up with come sprinkles.
Note : If U are new to baking I really suggest sticking with one kind of pan at a time in the oven as different pans mean different timings & that mean opening the oven again & again, which is not a good thing, but luckily all the muffins/cake came out good.

Wednesday, February 9, 2011

Chocolate Orange Loaf Cake.......and an excuse for missing from blogsphere

I've been off from the blog sphere from almost last 3 weeks or so, my last post was on auto schedule. Thanks to those of you who stopped at Spicebuds to write down some wonderful words and also sorry for missing all those wonderful posts out there. Now reason for not being active here, it's not me being lazy but we decided on a little road trip of  940 miles in two days.......many days went into packing before the trip & unpacking is still going on, two vehicles, two adults, two kids, two days, start to finish 7 states covered.......
excitement of thinking back & writing about all this adventure made me forgot to mention that one vehicle was a U-haul.......I know, I know what all you guys are saying Oh!!!!! "moving" now the story is clear...."How possibly some one would take a adventure trip amidst all the snow storms we are getting this season here in USA" right? that's what U guys were thinking??? But believe me if I ever start a travel blog I'll have many such adventure trips to share(not related to moving at all)......but really Thankful to GOD, No Complaints at all, the days we were in the process of moving(loading, travelling & unloading) skies were clear and sunny, it was colddddd but clear skies.
Now coming to the recipe, no I didn't baked it for our trip but it was baked back in dec. for Teacher Appreciation Day in my 3rd grader's school. When I asked the event Organiser about any suggestions what to bake, she simply said for some reason teachers like anything with chocolate in it. So I decided to make Orange Chocolate Cake because I had some good oranges on hand. Google to the help and instantly decided on this recipe which is originally from Nigella Lawson, but as the ingredients were weighed in this recipe so started to do some calculations of mine & somewhere between that time again googled and found this recipe which again is from Nigella Lawson(yes, it's basically same recipe) but this second link gave the ingredients measured in spoons & cups, making my work little bit more easy. I did tweaked the recipe a little bit acc. to what I had in my pantry at that time and also reduced the quantity of butter. I used 9x5x3 inch loaf pan, recipe given is for one loaf, here goes the recipe :
What I used :
For Cake/Loaf
  • 6 tablespoons unsalted butter, softened
  • 1 tablespoons honey
  • 1 tablespoon light corn syrup
  • 3/4 cup dark brown sugar, packed
  • 3/4 cup light brown sugar, packed
  • 1 cup all-purpose flour (used unbleached kind)
  • 1/2 teaspoon baking soda
  • 3 tablespoons unsweetened cocoa powder, sifted
  • 1 egg
  • 1/4 cup buttermilk at room temp.
  • 2 small oranges, zest of (1 tablespoon)
  • 1 small orange, juice of (3 tablespoons)
For Orange glaze :
  • 1/2 cup Confectioner sugar
  • 2 tablespoon Orange juice
What I did :
  1. Preheat oven to 325°. Grease 9x5x3 inch loaf pan.
  2. In a large bowl, mix the butter, honey, syrup and sugar until smooth. I used electric mixer.
  3. Add egg & mix in.
  4. In a separate bowl, combine flour, baking soda and cocoa powder.
  5. Mix around 2-3 tablespoon of the dry ingredients into the liquid mixture.
  6. Add half of the buttermilk and mix it.
  7. Add few more spoonfuls of dry ingredients and another round of mixing.
  8. Add rest of the buttermilk.
  9. Mix in remaining dry ingredients, mix everything together and now it's time for orange zest add it and lightly mix it.
  10. Finally at the end, add the orange juice.Pour batter into the prepared pan.
  11. Bake for 45 minutes or so.
  12. Leave it in the pan for a while, take it out on the wire rack to cool completely.
  13. Once the cake is cooled, make the glaze by mixing both ingredients to pourable consistency & drizzle it over the cake. If needed adjust the quantity of sugar and juice to get the consistency and taste U like. 
Note : I did made the same recipe without egg & it turned out good just replace egg with 1/4 cup buttermilk. Also baked this in the med. size bundt pan(6"), above recipe was perfect for two med. bundts, they are not only cute but perfect size for a small family. Did used a little extra cocoa powder in this and also choco. glaze to suit kids taste buds.....

Sunday, November 28, 2010

Eggless Black Forest Cake BUT no cherries

November is the month for party & celebration in my house. Other than regular festivals we have 4 birthdays and 2 wedding anniversaries to celebrate and out of these 6 celebrations 5 fall within the period of 10 days . This year I decided not to bake any cakes for anniversaries but for birthday's no excuse. So today I'm sharing this birthday cake I baked for my little one, she is two now, independent enough to do everything by herself(at least that's what she thinks). She had lots of fun whole day singing her b'day song...."Happy birday toote cakeah" and do I need to say the girl enjoyed the cake as much as she enjoyed singing her b'day song.
Recipe is simple, you basically need two or more layers of chocolate sponge cake, fresh heavy whip cream, some maraschino cherries and some good quality chocolate bar.  And once you assemble all this tasty stuff into layers the end result will be Black Forest Cake. My cake won't count as true Black Forest as cherries are missing from mine, mainly because b'day girl love MnM's and also I opted not to use any cherry liquor(kirsch) which is traditionally used  to soak the cake but rest of the elements are there. Mainly it's the whip cream which my kids love to eat cakes with so I decided to go for this. I baked the batter divided into 2 equal parts in 6 inches round pan, it sounds small but with our family of four I found this is the perfect size of cake plus it's going to be double layer so everybody gets enough.....plus I've a personal reason also, if I bake big cake then I get to bake less often....so small cakes mean more baking. Now for the recipe :

What U need :
For Cake :
  • 1 cup all purpose flour/maida
  • 3 tablespoons unsweetened cocoa powder
  • 1/2 tsp. baking powder
  • 1 tsp. baking soda
  • pinch of salt
  • 1/2 cup sugar(not using much sugar here as we r using sugar syrup & sweet whip cream)
  • 1 cup buttermilk OR 3/4 cup of home made dahi + 1/4 cup of water
  • 4 tablespoon butter at room temperature
  • 1 tsp. vanilla essence
For Syrup :
  • 1/2 cup water
  • 1 tablespoon regular white sugar(adjust as per your taste, how sweet u like)
For Filling and Assembly :
  • 1&1/2 cups fresh heavy whip cream(I only had 2 layers of cake in case if u r using more layers, will need more cream)
  • 2-3 tablespoons on confectioner sugar(depending upon once taste.....more or less sugar)
  • handful of M'n'M's (for filling if U can find small M'n'M's that works great, I was out of them so I used regular size only)
  • semisweet chocolate bar
What U do :
For Cake :
  1. Mix all the dry ingredients & sift  them to make sure no lumps are there.
  2. Cream butter & sugar. Add buttermilk or dahi. Mix it.
  3. Slowly add dry ingredients & mix everything together.
  4. Divide the batter into two 7 inches greased pans & bake them in pre heated oven at 350 degree F till the tooth pick inserted comes out clean.
  5. Let the cakes cool completely.
For Syrup :
  1. In the mean time while cake is cooling mix the water & sugar & make a syrup. Keep it in the fridge.
For Filling and Assembly :
  1. Whip up the cream with confectioner sugar to stiff consistency.(* see Baker's Notes) Keep it cold by placing it in the fridge when not working with it.
  2. Keep one cake onto cake board/serving plate, using a pastry brush drizzle/rub some syrup into it.
  3. Spread some whipped cream, around 1/2 inch thick layer & sprinkle some M'n'M's(see Notes if using cherries) onto it.
  4. Now put second cake upside down on it (* see Baker's Note at the bottom).
  5. Drizzle some syrup onto it.
  6. Using a offset spatula spread some icing on all the sides, if U have a turntable make sure to use it here because it really makes it easy. If icing on sides is not very smooth don't worry as in any case chocolate shavings will cover the sides.
  7. After icing on the sides ice the top of the cake, smooth it out.
  8. On parchment paper grate/shave the chocolate bar, I like to use my vegetable peeler, just make sure it's washed & dry(no vegetable odors)(*see Notes)
  9. Now come the most tedious or U can call it fun part  decorating the sides with the chocolate shavings. I did it the way I've always done it. Before starting with icing I always cut 4-5 strips of wax/parchment paper around 4-5 inch wide put them around & under the cake in a way so that half of the strip(width wise) is under the cake, so in case if icing etc. fell on the cake platter it's much easy to clean. Now either use your hands directly or put some choc. shavings on a piece of parchment paper & try to put it on to the edges.....icing will work as glue and will hold the shavings but there will be lot of chocolate shavings falling down & will get sticky & melty too so when it's done, to clean up U just pull the strips at the end and as a bonus U get to lick all that chocolate which falls on these strips...BUT now this is tedious way that's what I think & till now I never thought about googling it also as I normally decorate a cake once in a while(and my kids in routine are happy with some lots of whip cream & sprinkles on top). But now as I was writing this post thought about checking on web about same issue.....except the first result of my search nothing else(at least on the first page) delivered what I was looking for but that one result does answer this problem(click here if interested) and next time I'm gonna try that and yes it will change the sequence of steps in the filling & assembly part as according to that forum this should be the first step.
  10. Decorate the top of the cake as U wish with M'nM's or cherries or cover it totally with chocolate shavings.
Click of Baby Black Forest (it's hardly 4-5 inches in diameter) I made last year when hubby dear said no to Black Forest cake for his b'day (made after his b'day to satisfy my craving) & instead he wanted this one

 Notes :
  1. If using cherries drain & de-seed them. 
  2. For filling crush some cherries and spread them inside the layer along with the whip cream, making sure do not spread them to the edges, keep at least 1 inch margin from the edge of the cake, otherwise when U put the second layer on top of it filling will come out.
  3. Try to handle grated chocolate gently as it will melt quickly with your body heat.
Baker's Note :
  1. Whenever U want to decorate a cake make sure to use downside up(or call it upside down) because that's the smooth side.
  2. When whipping the cream make sure the bowl, whisk & cream everything is chilled otherwise it might not give U the right results.
Off goes this cake to Champa for her weekly bake-off.

Thursday, September 2, 2010

Peaches, Peaches & more Peaches......turned into......Salsa, Preserve & Ice Cream

Chutney, Preserve, Pickle, Salsa these were the few areas I was thinking and making almost a month ago. Many a times when I go for weekly grocery shopping I go overboard with fresh veggies & fruits. So trip to 2 different grocery stores in a day & a trip to peach orchard in the same weekend end result sweet & sour yummy treats. Though I've made quite a few Chutney's & Pickles etc. in the past few days like Mango Chunda/chutney/preserve  but today it's Peach time. Most of them were eaten just like that & few firm ones were turned into Salsa & riped ones were turned into peach preserve & finally over-riped were turned into cold treat peach ice-cream.

Fruit picking is one thing which not only kids enjoy but we as an adult also enjoy it equally. I still remember first time when we took our then 3 yr. old daughter for her first strawberry picking she was excited but Dad was over excited to get the freshest and juiciest fruit that I came back home with almost 15 pounds of fresh strawberries. I prefer to eat fruit just like that but that was the first time I started to make strawberry preserve, since then it's regular in my house. Now some recipes to use up all the juicy peaches no matter whether U picked up yourself  from the orchard or from the local farmers market.

Peach Salsa : I have to say this was among one of the best salsa I make, not only because we adult loved it but my 8 yr. old said she loved the combo I made, when I asked u liked the salsa, she replied whatever u call it(in her world salsa is either red or green) it's tasting good with this chicken tikka & pasta salad(that was the dinner). It's more of a guideline then a recipe U can change the fruit & veggies that goes in as per your taste or availability, also adjust the spices level as per your taste.
 What U need :
  • 3 firm peaches, skin removed(see notes)
  • 1 small cucumber
  • 1 tomato
  • 1/2 red onion
  • 1 stalk celery (optional, we like the crunchiness of it, if using make sure to dice it very fine)
  • 1/2 green /red bell pepper/capsicum/shimla mirch  (I used 2 Anaheim peppers)
  • 3-4 hot green chillies
  • 1 tsp. black pepper (kali mirch)
  • 1 tsp. roasted cumin powder(jeera powder)
  • salt
  • handful of cilantro(hara dhaniya), chopped
  • juice of 1 lime(nimbu)

What to do : Chop everything into small pieces except lime. Mix it in a big bowl, add black pepper, salt & cumin powder, squeeze the lime juice on to the mix. Mix it, taste it, if needed adjust the seasoning, cover it & keep it in the fridge. I prefer to make fruit salsas on the same day, usually 2-3 hours before I need it. If for some reason you want to make them ahead of time(in case of party or so) don't mix salt, cilantro and lime juice, get everything else ready & keep it in the fridge. When ready to use add salt, lime juice & freshly chopped cilantro.

You can serve it with Tortilla chips. pita chips or as a side for grilled fish or chicken, it goes well with roti(Indian flat bread) & rice also.
Variations : I make same recipe using mangoes also & mixing both fruits peaches as well as mangoes. If u want to make mango version only, try this one 1 mango + 1/2 cup of pineapple & leave the cucumber & tomato out, plus rest of the ingredients from the list, tastes awesome.

Peach Preserve/Chutney :
What U need :
  • 3 Large ripe peaches
  • 3 tbsp. brown sugar (can use regular one)
  • 1 cinnamon stick(dal chini)
  • 3-4 cloves(laung)
  • 1/2 tsp. black pepper
  • 1/2 tsp. red chilli pepper
  • 1 tbsp. white vinegar (can be substituted with lemon juice)

What U do :

  1. Remove the skin off from the peaches(see notes). Roughly chop them, remove the stone/seed.

  2. In a non reactive pan add peaches & sugar  let it sit for an hour or so.

  3. Add all the spices  cook the mixture for 20 minutes or so on med. heat. Check the sugar level U can add more at this point if U like, these peaches were very sweet so I didn't used a lot of sugar.

  4. Add Vinegar & cook till all the water evaporates around 5 minutes or so.

  5. We don't like fruit preserves to be very thick. So I cook it to the point where it's still little loose as when it cools off it gonna get thicker. To check that, preserve should coat your spoon but if u take the spoon out preserve should drip like honey.
** I use little pepper & red chili powder as it gives the preserve a nice little kick, as per your taste u can totally leave it out. I did not make the big batch as everyone in house preferred peach salsa(no sugar so he loves it) & peach ice-cream(this got lot of sugar, but when it's ice-cream he don't care...lol!)

Peach Ice-Cream : I didn't took any pics, sorry about that. It's same recipe as Mango Ice-cream we used around 4 large peaches fully riped. Take the skin off(see notes) & remove the seed also. Roughly chop the fruit & sprinkle 2-3 tablespoon of sugar from the total sugar u r using. Leave it for around 2 hours in the fridge. Pulse the fruit pulp in blender making sure it's not fully pureed as we like little bites of fruit here & there in ice cream. Now follow the same directions as we did in my previous ice cream.

Notes :
In case of fully ripe skins, usually u can simply peel the skin off using your fingers(first make a little cut on peach using knife). In case of firm ones boil a pot of water & add few peaches at a time in it for 40-60 seconds then transfer them to ice-cold water for a minute or so & now u can peel the skin off. Enjoy the last bits of summer.

Monday, August 30, 2010

Healthy Banana Bread loaded with all the good stuff....not only Whole Wheat but Eggless too

It's been little busy over here, summer vacation is over. Trying to set some routine after 2 & 1/2 months of  break. Mind is working hard again to find interesting options for school lunch & after school snack, on top of that this year in 3rd grade they have to take snack too. So here's this simple recipe which I feel is a very good option for any time of the day snack, we have been eating this as morning breakfast with a glass of milk or coffee. It's quite filling & healthy too. It's Banana Bread but not regular kind, I'm using not only whole wheat flour but oats also in this. I had no plans of making this bread but thanks to my little one she has found one new hobby, whenever she can grab a banana she likes to peel it, until now she usually would eat it too, but now-a-days she only peels them & she's done. Now what do I do with 3 peeled bananas in a day. So I twisted my regular banana bread recipe added few more things to it and here goes the recipe(please do check the variations at the end of the recipe, got whole wheat version too) :

What U need :
dry ingredients :
  • 1/2 cup + 1 Tbsp. all purpose flour (I used maida)
  • 1/2 cup whole wheat flour(I used atta-flour used for making Indian style flat bread)
  • 1/2 cup quick cooking oats
  • 1 /1/2 tsp. baking soda
  • 1/2 tsp. salt
  • 1 tsp. cinnamon
  • 1 tsp. dry ginger powder(optional)

wet ingredients :
  • 3 med. size ripe bananas
  • 3 Tbsp. veg. oil
  • juice of 1 orange
  • 4 Tbsp. honey
  • 1/4 cup light brown sugar

good stuff :
  • 2 Tbsp. dry roasted flax seeds
  • 1/2 cup roasted, chopped almonds
  • 10 dates chopped

What U do :
  1. Take all the good stuff(nuts & dry fruit etc.) & sprinkle 1 Tbsp. of flour on them & mix them with the hand so they get good coating of flour. It  helps preventing them from sinking to the bottom of the pan.
  2. Mix all the dry ingredients using a fork making sure no lumps are formed.
  3. In a big bowl mash bananas using the back side of fork & add rest of the wet ingredients from the list.
  4. Add dry ingredients to wet ones. Gently mix them.
  5. Add mixture of good stuff to the batter, fold it in.
  6. Bake it in the greased loaf pan for 35-40 min.(till the tooth pick comes clean) at 350 degree F.


Note :
This bread was little crumbly but very flavorful, it reminded me of fruit cake & was quite soft even for next couple of days. I did made this for 3-4 times in this month but every time with little variations. Actually this recipe is very forgiving one can easily adjust the ingredients according to the availability or taste. All the variations had almost same amount of oats.

Variations :
First was with half all purpose flour & half whole wheat flour.
 Second was with totally whole wheat flour, came out really good without any compromise on taste.

Third was again totally whole wheat flour but I added 2 Tbsp. of Ragi(finger millet) flour & 1 Tbsp. of flax seed(alsi) meal(powder) also. Instead of almond & dates I only used around 1/2 cup of black raisins & I didn't had any oranges so I added 1-8 0z. carton of apple juice, reduced oil to 2 Tbsp. only(works fine) also reduced the sugar a little bit. Bananas used were also one & a half only. I baked them in mini bundt pan so baking time was reduced to 16 min. only at 350 degree F(recipe yielded 12 mini bundt cakes-I had filled each cavity to 3/4 level). I highly recommend this recipe if you are trying to bake with whole wheat flour as it was light & not at all heavy texture. And these were not at all crumbly. Here's the click...
And this wonderful healthy bread/mini bundt cakes  goes to Champa for her weekly bake-off.

Tuesday, August 17, 2010

Winner of $60 giveaway and Strawberry + Blueberry Preserve / Jam

First of all thanks to all the readers who took time out to browse thru my recipes and left the comment on the previous post, really meant a lot to me. Now, for the winner as you all know there can be only one so I took help of my daughter to pick one. Yes, I'm little old fashioned still have not figured out(read it as lazy also) how to use Random.org so wrote all the names on piece of paper, folded each piece of paper, mixed together in a bowl, picked one and Congrats to Eve for winning $60 gift certificate from CSN. I'll send you an email with all the details, enjoy your win and Thanks to CSN for giving me the opportunity to host this giveaway.

Now for today's recipe here's a simple Strawberry and Blueberry Preserve/Jam.

Simple ingredients no fancy stuff, I'm making this from almost last 5 yrs. One of his Aunt when she visited us from dehradun-India(hub for strawberry cultivation in India) gave me this simple recipe, since then I usually make it every other week in strawberry season. My husband doesn't like store bought Jams/Preserve but this is one home-made preserve he eats with everything. I even freeze it for couple of months(I don't do canning) when I get big supply of strawberries, just thaw it in the fridge before use(see notes). I prefer to keep it in the fridge and it goes well with pancakes, as a spread on toasted bread, on top of ice cream or simply spoonful from jar to mouth. Now for the recipe :
What U need :

  • 1 pound of fresh strawberries

  • 1/2 cup fresh blueberries

  • 3/4 to 1 cup white sugar (depending upon the sweetness of berries)

  • juice of half a lemon
What U do :

  1. Wash all the berries. Hull the strawberries & roughly chop the strawberries.

  2. In a heavy bottom steel pan(non-reactive) put all the berries and mix sugar in it. Let it sit for 3-4 hours.

  3. On a medium heat bring the berry mixture to a boil add lemon juice & let everything cook together till it becomes thick & glossy, keep stirring in between.

  4. Once the fruit is cooked & all soft you can mash it with the back side of your spoon, that way it's still chunky but don't have too big pieces of fruit. It might take around 20-30 minute or so to cook the whole thing depending upon how juicy the fruit is. Once cool transfer it to sterilized jar. 

Note : You can easily leave the blueberries out for only strawberry version. Also this is not very sweet, it's more of sweet & tangy in taste but if U like more sweeter version U can simply increase the quantity of sugar. For freezing I usually portion it into roughly 2 week supply & fill it into glass bottles and don't fill to the brim, because when it freeze it expands so need extra space otherwise the bottle will crack. I usually fill 3/4 of the bottle.

As I'm writing this post, in my mind I'm planning to make a fresh batch of this preserve in the morning as the one made last week is already finished, little one enjoyed licking it from the plate. So go ahead and try it at least once before the strawberry season slips away.

Wednesday, July 28, 2010

Mango Ice-cream & Coffee Ice cream

Now a days we are enjoying pure home made ice cream treats as lunch, specially when outside temperature is in 90's. Kids don't want to eat lunch specially when they are slepping till 10 in the morning & by the time they finish their breakfast or I should call it brunch it's almost noon. So, as soon as one batch is made, plan for next batch is already in discussion.....so Mom do U think we can make choc. flavour next time. I'm only the incharge of making sure that we have enough supplies on hand as the credit for this delicious ice cream goes to my 8 yr. old & her Dad. Now for the recipe :

What U need :
  • 3/4 cup whole milk, chilled
  • 3/4 cup regular sugar
  • 2 cups heavy cream, chilled
  • 1 tsp. pure vanilla extract(optional)
  • pulp from 2 medium size mangoes, chilled

What U do :
  • Using a blender puree the mango pulp, use pulse if u like little pieces in it, keep aside.
  • Using a hand mixer or a whisk combine the milk & granulated sugar, until it dissolved.
  • Stir in heavy cream & vanilla to taste.
  • If using ice cream maker follow the instructions of the ice cream maker. Towards the last 10 minutes of churning add chilled mango pulp & once done(usually whole process takes about 35 min.) transfer it to air-tight containers & let it freeze for at least 2 hours or so.
  • If U don't have ice cream maker blend everything together including mango pulp & let it set in the freezer in air tight container & every couple of hours take it out whip the ice cream(to break the ice crystals), freeze it again. Repeat the process for at least 3 more times.
Here's a pic of Coffee Ice cream with home made brownie bits as topping(Coffee + Chocolate nothing can beat the combination). For coffee version omit mango pulp & blend 3 tablespoon of instant coffee powder  with the mixture & during the last 5 minutes of churning process add 3 tablespoon of chopped semi sweet chocolate + 3 tablespoon of roasted chopped almonds.

Note : It's been 5 years since I'm using my Cuisinart ice cream maker but have never tried manual method but it's a common process & in my case comes from an experienced person who in his childhood has done lot of arm wrestling for this yummy cold treats, yes you guys guessed it right it's DH.....in fact he has some first hand experience of making "mutki wali kulfi" too.....but for that I'm gonna need matka first so till then I'm happy with my electronic ice-cream maker.

Wednesday, June 30, 2010

Blueberry Muffins with Orange streusel and Eggless too


Summer means berries, berries & more berries. This Sunday when he got few packs of fresh blueberries, he told me to make blueberry muffins. I have made these quite a few times & we all love these over the regular kind of blueberry muffins. First time when I ate these on one of our road trip I absolutely loved these....moist & nice crumb with lots of blueberry flavor & nice crunch on the top, to me it's perfect. I will prefer these over any other kind of muffins. I have used Orange zest for topping one can easily change it to lemon zest if they like, also if you wish store bought jam(chunkier kind) can be used but I really recommend sparing 10 minutes & making a small batch of jam. Recipe below is for 12 regular size muffins.
What U need :
for muffins
2 cups + 1 Tblsp. unbleached all purpose flour
2 & 1/2 tsp. baking powder
1/2 tsp. salt
1 & 1/4 cup light brown sugar
4 Tblsp.(1/2 stick) unsalted butter, melted
4 Tblsp. veg. oil
1 cup buttermilk(I use 3/4 cup plain dahi/yogurt + 1/4 cup water)
1 tsp. vanilla extract
1/2 cup blueberries rolled in 1 Tblsp. of flour

for jam
1 cup blueberries
3-4 Tblsp. regular sugar

for streusel topping
2 Tblsp. regular sugar
zest of 1 orange

What U do :
1. Make jam
  • Cook blueberries with sugar on med. heat for about 7-10 minutes till u get the jam like consistency. Mash the berries with the back side of the spoon. Use more or less sugar as per your taste & tartness of berries. Let it cool.

2. To make streusel topping mix sugar & zest, keep aside.

3. Make muffins
  • Heat oven to 425 degree F. Prepare muffin tin with non-stick spray or line muffin tin with paper liners.
  • In a large bowl whisk flour+baking powder+salt.
  • In another bowl mix sugar with oil & melted butter. Add buttermilk & vanilla, whisk everything together.
  • Now add wet mix to dry mix & gently mix everything, using a hand whisk. Batter will be thick & might have some lumps, BUT DO NOT OVER MIX.
  • Using a spatula fold in the berries coated with flour.
  • Spoon the batter into muffin tins. Now using a small spoon add some jam to the center of the tin & with the back side of the spoon swirl the batter in the muffin.

  • Lastly sprinkle the streusel topping on the top of muffins & bake them for around 15-18 minutes(mine were done in 15 minutes).

Enjoy these muffins when they are still hot or keep them in the fridge for next morning breakfast or late night snack, warm them in the microwave for about 15-20 seconds or enjoy it cold if you like it that way.

Thursday, June 24, 2010

Orange Biscotti almost Eggless

Biscotti - twice baked Italian cookies, to get that extra crunch so that biscotti become hard enough to be dipped into coffee, milk or sweet wine & not crumble. But they should never be so hard to crack a tooth. It was on my "to do list" from a long time or I should say it was on His list for me to do. Past sunday for Father's day brunch I decided to surprise him with home made biscotti along with fresh home made pizza(DD's request).

Now before moving to the recipe I would like to mention that source of this recipe is the book called "the Cake mix Doctor" which I got from Champa of VersatileKitchen back in the month of may. Around that time only I also bought a cake mix box for the first time in my life, thinking that I'll try a cake with that, but whenever I bake I'm so use to of all purpose flour/maida that cake mix box kept waiting in the pantry for it's turn. Finally night before father's day I sat with this book to find out some recipe for the cake but when I saw recipe for Lemon Pecan Biscotti, I decided that's it. I had Orange supreme cake mix so I used that & I was out of almonds otherwise I would have used that so  instead I used mini choc. chips. Also I decided to go eggless with this recipe so used  two frozen bananas which were left after making eggless choc. banana cake, but while making the dough I felt it was too tight so I ended up using one egg yolk(as I had no more ripe bananas & was not sure about using milk). Finally here goes the recipe :

What U need :
  • parchment paper for the pan
  • 1 package(18.25 oz.) orange cake mix(I used Duncan Hines)
  • 8 tablespoons(1 stick) butter, melted
  • 2 large ripe bananas(might need half extra banana if bananas are med. size)
  • 1 egg yolk(my bananas were toward the smaller size that's why I added egg)
  • 1 cup all-purpose flour
  • 1/2 cup chopped nuts(I used mini choc. chips)

What U do :
  1. Place a rack in the center of the oven, preheat to 350 degree F. Line a baking sheet with parchment paper & set aside.
  2. Place all the ingredients in a mixing bowl & blend on low speed for 3-4 minutes. Dough should come together into a ball. Transfer it to the prepared baking sheet. With lightly floured hands, shape the dough into a rectangle about 14 inches long by 4 inches wide by 1/2 inch thick. Mound the dough so it is slightly higher in the center.
  3. Bake the biscotti rectangle for around 30-35 minutes, do the toothpick test(like u do it for cakes). Remove the baking sheet from the oven & let the biscotti cool for 10 minutes. Leave the oven on.
  4. Using a sharp serrated knife slice the rectangle on the diagonal into 1 inch-thick slices. You should get 14 slices. Carefully turn these slices onto their sides, on the same baking sheet. Return the baking sheet to the oven.
  5. Bake for another 10 minutes. Turn the oven off, and let the biscotti remain in the oven until they are crisp, 30 to 40 min. more. Remove the baking sheet from the oven, transfer the biscotti to a rack, and allow them to cool completely,.
  6. Enjoy it with your fav. drink milk, tea or coffee & store leftover biscotti in an air tight container at room temp. for up to several weeks.

receipe source : the Cake mix Doctor by Anne Byrn

Notes : though I had baked them for the minimum specified time, still mine were little overdone, but still tasted good. I did checked them little before the mentioned time but they were not done at that time so I guess for next time I'll reduce the temp. from 350 degree to may be 340 degree. so that they don't get too brown from outside so quickly.

I'm happy that I tried these, not only because everybody loved it but also because it tasted quite similar to our very own Indian cake rusk, a very popular tea snack in Delhi. We love those &  I usually get those from Indian grocery store, please don't get confused with plain rusk here, as plain rusk are not sweet & they are kind of a hard toast but cake rusk are buttery & very much similar to biscotti. Now I feel no need to buy those as this was really a easy procedure & I'm surely gonna make it on a regular basis but with different flavors.

Biscotti is off to Champa  for her weekly Bake-off & also to  Suma of Veggie Platter, who's hosting this month's Baking from the book  event started by Champa.

Sunday, January 10, 2010

Wheat Pulav - Vegetable Dalia

Dalia-cracked whole wheat, many of you must have eaten it in the form of porridge, roasted then boiled with milk or water sprinkled with some sugar or honey. It's a very common breakfast in Northern India. It's one of that thing you like it or don't.

This is not only healthy but truly one-pot dish gets ready in 15-20 minutes. It's kind of regular in my house, I usually serve it with home made dahi(plain yogurt). I always loved dalia(cracked wheat), the sweet version with milk but no one other than me likes it over here. Few years back when I ate this savory version of dalia for the first time, at my MIL's friends house I didn't liked it much( I was so use to of eating sweet version) but I liked the idea. After coming back to my house I decided to try it for my DH, he instantly liked it. Since then it's regular in my house, many a times when nothing else to cook or don't want to spend time in kitchen this is one dish which comes to my mind. And now I enjoy it more than the sweet version. Here's how it goes :

Ingredients :

  • 1 cup cracked wheat(dalia) available at Indian grocers
  • 1 & 1/2 cup of chopped mixed veggies (like carrots, beans, peas etc.)
  • 2 & 1/5 cup of water
  • salt ar per taste (I used 1 & 1/2tsp.)
  • 1 Tblsp. freshly chopped ginger
  • 2-4 green chillies
  • 1/2 tsp. black pepper(kali mirch)
  • 1/2 tsp. turmeric(haldi)
  • 1 tsp. garam masala
  • 2-3 cloves(laung)
  • pinch of asafoetida (hing)
  • handful of chopped cilantro
  • lime or lemon juice
  • plain yogurt(dahi) to serve with
  • 1 Tblsp. of clarified butter( desi ghee) or evoo for vegan version

Method :

  1. Heat ghee/evoo in the pressure cooker add hing to it and after few seconds add cloves. Now add ginger & then add dalia to it & roast it for few minutes(may be for 5-6 minutes), you'll know it with the aroma, that it's roasted. OR instead you can also dry roast dalia in a big pan in advance & keep it in a air tight container for later use so you can avoid roasting it at this stage.
  2. Once it's roasted add chopped veggies & all the dry spices along with the chillies & water. Close the lid of the pressure cooker.
  3. After one whistle turn the gas to slow for another 3-4 minutes and then turn it off.
  4. When all the steam escaped open the lid add lime juice & fluff up the dalia using a fork & garnish with fresh cilantro before serving.

It's very healthy dish, and very full filling also. You can change the flavours by using spices of your taste, but for me & my family this works really well. It's very healthy for little ones also, my little one started to enjoy this at the age of 10 months or so.

Note : 1) Cracked wheat is usually available in two types one is very finely cracked which is good if making sweet version or using it for babies. Other type is of little coarse consistency which looks very similar to cous-cous pasta, and that is the one I prefer for this savory version.

2) Proportion of water can some time vary according to the quality of dalia, if it comes out too wet , next time reduce the quantity of water by little bit.

Friday, December 4, 2009

Veggie Paneer Macaroni

There's no recipe for this pasta. In fact many times I quick fix this kind of lunch with whatever is available or whatever need to be used, today I had very little time to fix lunch for myself & the little one, so decided to cook some pasta. Here's how it goes :

Keep water for boiling and at the same time add around 1/2 cup of frozen mixed vegetables. When water comes to boil add some salt & pasta, preferably small type(I used macaroni). When pasta is cooked drain water add some home made fresh paneer( Indian cheese), black pepper, red chilli flakes & herbs(parsley, oregano) of your choice. Mix everything together, let it cook for a minute. Turn of the gas & enjoy your Veggie Paneer Macaroni.

I'm sending this quick & easy, one pot dish to Radhika & Sudeshna's Food for 7 stages of life : Kids event. This post is quite small so I guess I can share some clicks I had in the Thanksgiving weekend.
Something man made :
but no one can beat Nature......

Monday, November 23, 2009

Cranberry Chutney or Sauce - Part 2 also an Update for previous post

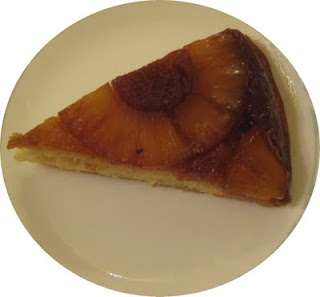
Update on Pineapple upside down Cake : Finally I managed to upload the pics, and also I realized that I didn't took the picture of whole cake, I told you, I love this cake so much that only thing I can think of, while sitting in front of this cake is EATING IT. But I surely got some pictures of the whole process, though they are not very clear, but I wanted to share with you all. Also one more thing DH thinks I used too much sugar for caramel but to me it was perfect specially when eaten with whip cream(point to be noted I made that cake for me, after a long time), so I guess sugar for caramel can be further reduced to 3 tblsp. One more thing I wanted to add for vegan version soy butter can be used instead of regular one.
Now let's come to today's post Cranberry chutney/sauce/salsa or whatever you like to call it.
This is my second cranberry chutney, I think it's more like salsa. As I wrote in my previous post the first chutney I made was good but had lot of sugar b'coz of sourness of berries, so I came up with this more healthy option by adding 2 apples to it(so I can eat as much as I want, without any guilty). Apples I used were quite sweet, so try to use sweet varieties, that way you can cut the sugar out of this recipe.Now, little bit on health benefits of these berries(this info is collected from web), some common ones are :

1) treating UTI(urinary tract infections)
2)reduction of Dental Plague
3)anti-cancer activity
4)reducing the risk of heart disease
5)preventing the development of kidney stones
6) provide relief for asthma patients

Now the recipe.

Ingredients :
  • half med. size onion chopped
  • 2 apples peeled & chopped( i used red delicious)
  • 1/2 lb. fresh cranberries(that's half bag)
  • 1 tblsp. sugar
  • salt as per taste
  • black pepper as per taste(optional)
  • red chilli powder 1 tsp.(can be left out if making for kids)
  • garam masala 1 tsp.
  • ginger 2 tblsp. freshly grated
  • water/apple juice 4 oz. or more
  • little oil

Method :

Heat little oil in a heavy bottom pan, saute onions for 2 min. or so then add rest of the ingredients. At this point only add 4 oz. of water. Mix everything together, cover & let it cook on med. for around 15 min., stir in between.

Add more water according to the consistency you like, I kept this one little loose like salsa kind. Once the apple & cranberries are cooked(they'll be mushy) it's done.

Serve it with with your choice of bread, roti, rice, as chips dip or as a sauce for grilled meat or seafood. I enjoyed it eating just like that, with nothing.So, go and grab these fresh berries before they disappear from store shelfs. As for me, I'm gonna make little extra this time & try to freeze it for later use.

It's very healthy for kids also, with only 1 tblsp. of sugar, which infact can be replaced by honey also. Kids will surely like this fruit sauce, tangy & sweet. I would like to send this recipe to :

1) Radhika & Sudeshna's Food for 7 Stages of Life - Kids(4-14 yrs.) .

2) Yasmeen's Helath Nut Challenge 3 : Healing foods .

3) Sharmi's CFK- Veggies & Fruits.

4) On Sanghi's suggestion I'm sending this cranberry chutney as well as Pineapple upside down cake for her FIL-Fruits event. I'm dedicating the cake to my DD as I love to bake for her, she love cakes and specially after eating this one she said this is the most tasty & soft vanilla cake she ever ate. And as far the cranberry chutney is concerned I dedicate it to my Mom who's the inspiration behind my cooking.