Showing posts with label Fruits. Show all posts

Monday, February 21, 2011

Fat Free Almond and Banana Bundt Cake flavoured with Cardamom

I've been baking with bananas so regularly these days that if I say it's banana bread my daughter say can't U make a regular cake like chocolate cake. So this time I baked it in regular size bundt pan & didn't forget "not to mention bananas anywhere", so..... it's cake with chocolate chips......served with some freshly whipped cream and did I mentioned it's cardamom flavor, again something NOT to be mentioned(to her) and yes, no mention of whole wheat flour either & wait there is more almond meal & flax seed.....let me give you the whole recipe but before that another look while cake is cooling down.

No!No!No! it didn't stick to the pan, but....
A Mouse in the House now the recipe.....
What I used :
  • 1/2 cup whole wheat flour(I use atta available at Indian grocery stores)
  • 1/2 cup unbleached all purpose flour
  • 1/2 cup almond meal(grind almonds using a spice/coffee grinder)
  • 2 tablespoon ground flax seeds/flax meal
  • 1 tsp. baking soda
  • 1 egg
  • 3 over ripe bananas
  • 4 green cardamoms/choti illachi (seeds taken out & crushed into powder,)
  • 2 tablespoon of dark brown sugar
  • handful of chocolate chips
See it didn't stick to the bottom
What I did :
  1. Grease 6 cup capacity bundt pan. & heat oven to 350 degree F.
  2. Mix all the dry ingredients,including sugar & cardamon powder, making sure there are no lumps.
  3. Mash the bananas to smooth paste, add egg, mix it together.
  4. Mix dry ingredients to wet. Mix everything together & finally fold in handful of chocolate chips.
  5. Bake till toothpick comes out clear, mine was done in exact 30 minutes.
Note :
  1.  Don't throw the outer shell of green cardamons, use them for flavouring tea or rice.
  2. I used 6 cup capacity bundt pan as I wanted to test my new pan(yes I'm addicted to bundt pans now, first I got the baby ones then med. size & this is the new addition to the collection) but I believe this recipe would fit in the 8" or 9" square or round pan also.
  3. If  U don't like cardamom flavour replace it with vanilla.
  4. I tried same recipe egg less also by replacing egg with 1/4 cup buttermilk & increasing baking soda with around 1/4 of tsp. came out good.
  5. I'm not using any butter or oil in this recipe & believe me we didn't miss that, bananas work good as butter substitute also.
  6. Also it's not very sweet but sweetness from bananas & little brown sugar was perfect for our taste buds, but for those who love their cakes more sweet, quantity of sugar can be increased.
 And finally the Mouse is caught in action
did I mentioned she was born in the year of Rat as per Chinese zodiac....so basically she is just doing what she is suppose to do and not giving up any of her mousy tricks....and btw my little mouse had big serving of this cake as her lunch that day....off it goes to Champa for her weekly bake-off.
For other recipes for baking with bananas like cake/biscotti/muffins/bread U can click here.

Thursday, September 2, 2010

Peaches, Peaches & more Peaches......turned into......Salsa, Preserve & Ice Cream

Chutney, Preserve, Pickle, Salsa these were the few areas I was thinking and making almost a month ago. Many a times when I go for weekly grocery shopping I go overboard with fresh veggies & fruits. So trip to 2 different grocery stores in a day & a trip to peach orchard in the same weekend end result sweet & sour yummy treats. Though I've made quite a few Chutney's & Pickles etc. in the past few days like Mango Chunda/chutney/preserve  but today it's Peach time. Most of them were eaten just like that & few firm ones were turned into Salsa & riped ones were turned into peach preserve & finally over-riped were turned into cold treat peach ice-cream.

Fruit picking is one thing which not only kids enjoy but we as an adult also enjoy it equally. I still remember first time when we took our then 3 yr. old daughter for her first strawberry picking she was excited but Dad was over excited to get the freshest and juiciest fruit that I came back home with almost 15 pounds of fresh strawberries. I prefer to eat fruit just like that but that was the first time I started to make strawberry preserve, since then it's regular in my house. Now some recipes to use up all the juicy peaches no matter whether U picked up yourself  from the orchard or from the local farmers market.

Peach Salsa : I have to say this was among one of the best salsa I make, not only because we adult loved it but my 8 yr. old said she loved the combo I made, when I asked u liked the salsa, she replied whatever u call it(in her world salsa is either red or green) it's tasting good with this chicken tikka & pasta salad(that was the dinner). It's more of a guideline then a recipe U can change the fruit & veggies that goes in as per your taste or availability, also adjust the spices level as per your taste.
 What U need :
  • 3 firm peaches, skin removed(see notes)
  • 1 small cucumber
  • 1 tomato
  • 1/2 red onion
  • 1 stalk celery (optional, we like the crunchiness of it, if using make sure to dice it very fine)
  • 1/2 green /red bell pepper/capsicum/shimla mirch  (I used 2 Anaheim peppers)
  • 3-4 hot green chillies
  • 1 tsp. black pepper (kali mirch)
  • 1 tsp. roasted cumin powder(jeera powder)
  • salt
  • handful of cilantro(hara dhaniya), chopped
  • juice of 1 lime(nimbu)

What to do : Chop everything into small pieces except lime. Mix it in a big bowl, add black pepper, salt & cumin powder, squeeze the lime juice on to the mix. Mix it, taste it, if needed adjust the seasoning, cover it & keep it in the fridge. I prefer to make fruit salsas on the same day, usually 2-3 hours before I need it. If for some reason you want to make them ahead of time(in case of party or so) don't mix salt, cilantro and lime juice, get everything else ready & keep it in the fridge. When ready to use add salt, lime juice & freshly chopped cilantro.

You can serve it with Tortilla chips. pita chips or as a side for grilled fish or chicken, it goes well with roti(Indian flat bread) & rice also.
Variations : I make same recipe using mangoes also & mixing both fruits peaches as well as mangoes. If u want to make mango version only, try this one 1 mango + 1/2 cup of pineapple & leave the cucumber & tomato out, plus rest of the ingredients from the list, tastes awesome.

Peach Preserve/Chutney :
What U need :
  • 3 Large ripe peaches
  • 3 tbsp. brown sugar (can use regular one)
  • 1 cinnamon stick(dal chini)
  • 3-4 cloves(laung)
  • 1/2 tsp. black pepper
  • 1/2 tsp. red chilli pepper
  • 1 tbsp. white vinegar (can be substituted with lemon juice)

What U do :

  1. Remove the skin off from the peaches(see notes). Roughly chop them, remove the stone/seed.

  2. In a non reactive pan add peaches & sugar  let it sit for an hour or so.

  3. Add all the spices  cook the mixture for 20 minutes or so on med. heat. Check the sugar level U can add more at this point if U like, these peaches were very sweet so I didn't used a lot of sugar.

  4. Add Vinegar & cook till all the water evaporates around 5 minutes or so.

  5. We don't like fruit preserves to be very thick. So I cook it to the point where it's still little loose as when it cools off it gonna get thicker. To check that, preserve should coat your spoon but if u take the spoon out preserve should drip like honey.
** I use little pepper & red chili powder as it gives the preserve a nice little kick, as per your taste u can totally leave it out. I did not make the big batch as everyone in house preferred peach salsa(no sugar so he loves it) & peach ice-cream(this got lot of sugar, but when it's ice-cream he don't care...lol!)

Peach Ice-Cream : I didn't took any pics, sorry about that. It's same recipe as Mango Ice-cream we used around 4 large peaches fully riped. Take the skin off(see notes) & remove the seed also. Roughly chop the fruit & sprinkle 2-3 tablespoon of sugar from the total sugar u r using. Leave it for around 2 hours in the fridge. Pulse the fruit pulp in blender making sure it's not fully pureed as we like little bites of fruit here & there in ice cream. Now follow the same directions as we did in my previous ice cream.

Notes :
In case of fully ripe skins, usually u can simply peel the skin off using your fingers(first make a little cut on peach using knife). In case of firm ones boil a pot of water & add few peaches at a time in it for 40-60 seconds then transfer them to ice-cold water for a minute or so & now u can peel the skin off. Enjoy the last bits of summer.

Monday, August 30, 2010

Healthy Banana Bread loaded with all the good stuff....not only Whole Wheat but Eggless too

It's been little busy over here, summer vacation is over. Trying to set some routine after 2 & 1/2 months of  break. Mind is working hard again to find interesting options for school lunch & after school snack, on top of that this year in 3rd grade they have to take snack too. So here's this simple recipe which I feel is a very good option for any time of the day snack, we have been eating this as morning breakfast with a glass of milk or coffee. It's quite filling & healthy too. It's Banana Bread but not regular kind, I'm using not only whole wheat flour but oats also in this. I had no plans of making this bread but thanks to my little one she has found one new hobby, whenever she can grab a banana she likes to peel it, until now she usually would eat it too, but now-a-days she only peels them & she's done. Now what do I do with 3 peeled bananas in a day. So I twisted my regular banana bread recipe added few more things to it and here goes the recipe(please do check the variations at the end of the recipe, got whole wheat version too) :

What U need :
dry ingredients :
  • 1/2 cup + 1 Tbsp. all purpose flour (I used maida)
  • 1/2 cup whole wheat flour(I used atta-flour used for making Indian style flat bread)
  • 1/2 cup quick cooking oats
  • 1 /1/2 tsp. baking soda
  • 1/2 tsp. salt
  • 1 tsp. cinnamon
  • 1 tsp. dry ginger powder(optional)

wet ingredients :
  • 3 med. size ripe bananas
  • 3 Tbsp. veg. oil
  • juice of 1 orange
  • 4 Tbsp. honey
  • 1/4 cup light brown sugar

good stuff :
  • 2 Tbsp. dry roasted flax seeds
  • 1/2 cup roasted, chopped almonds
  • 10 dates chopped

What U do :
  1. Take all the good stuff(nuts & dry fruit etc.) & sprinkle 1 Tbsp. of flour on them & mix them with the hand so they get good coating of flour. It  helps preventing them from sinking to the bottom of the pan.
  2. Mix all the dry ingredients using a fork making sure no lumps are formed.
  3. In a big bowl mash bananas using the back side of fork & add rest of the wet ingredients from the list.
  4. Add dry ingredients to wet ones. Gently mix them.
  5. Add mixture of good stuff to the batter, fold it in.
  6. Bake it in the greased loaf pan for 35-40 min.(till the tooth pick comes clean) at 350 degree F.


Note :
This bread was little crumbly but very flavorful, it reminded me of fruit cake & was quite soft even for next couple of days. I did made this for 3-4 times in this month but every time with little variations. Actually this recipe is very forgiving one can easily adjust the ingredients according to the availability or taste. All the variations had almost same amount of oats.

Variations :
First was with half all purpose flour & half whole wheat flour.
 Second was with totally whole wheat flour, came out really good without any compromise on taste.

Third was again totally whole wheat flour but I added 2 Tbsp. of Ragi(finger millet) flour & 1 Tbsp. of flax seed(alsi) meal(powder) also. Instead of almond & dates I only used around 1/2 cup of black raisins & I didn't had any oranges so I added 1-8 0z. carton of apple juice, reduced oil to 2 Tbsp. only(works fine) also reduced the sugar a little bit. Bananas used were also one & a half only. I baked them in mini bundt pan so baking time was reduced to 16 min. only at 350 degree F(recipe yielded 12 mini bundt cakes-I had filled each cavity to 3/4 level). I highly recommend this recipe if you are trying to bake with whole wheat flour as it was light & not at all heavy texture. And these were not at all crumbly. Here's the click...
And this wonderful healthy bread/mini bundt cakes  goes to Champa for her weekly bake-off.

Tuesday, August 17, 2010

Winner of $60 giveaway and Strawberry + Blueberry Preserve / Jam

First of all thanks to all the readers who took time out to browse thru my recipes and left the comment on the previous post, really meant a lot to me. Now, for the winner as you all know there can be only one so I took help of my daughter to pick one. Yes, I'm little old fashioned still have not figured out(read it as lazy also) how to use Random.org so wrote all the names on piece of paper, folded each piece of paper, mixed together in a bowl, picked one and Congrats to Eve for winning $60 gift certificate from CSN. I'll send you an email with all the details, enjoy your win and Thanks to CSN for giving me the opportunity to host this giveaway.

Now for today's recipe here's a simple Strawberry and Blueberry Preserve/Jam.

Simple ingredients no fancy stuff, I'm making this from almost last 5 yrs. One of his Aunt when she visited us from dehradun-India(hub for strawberry cultivation in India) gave me this simple recipe, since then I usually make it every other week in strawberry season. My husband doesn't like store bought Jams/Preserve but this is one home-made preserve he eats with everything. I even freeze it for couple of months(I don't do canning) when I get big supply of strawberries, just thaw it in the fridge before use(see notes). I prefer to keep it in the fridge and it goes well with pancakes, as a spread on toasted bread, on top of ice cream or simply spoonful from jar to mouth. Now for the recipe :
What U need :

  • 1 pound of fresh strawberries

  • 1/2 cup fresh blueberries

  • 3/4 to 1 cup white sugar (depending upon the sweetness of berries)

  • juice of half a lemon
What U do :

  1. Wash all the berries. Hull the strawberries & roughly chop the strawberries.

  2. In a heavy bottom steel pan(non-reactive) put all the berries and mix sugar in it. Let it sit for 3-4 hours.

  3. On a medium heat bring the berry mixture to a boil add lemon juice & let everything cook together till it becomes thick & glossy, keep stirring in between.

  4. Once the fruit is cooked & all soft you can mash it with the back side of your spoon, that way it's still chunky but don't have too big pieces of fruit. It might take around 20-30 minute or so to cook the whole thing depending upon how juicy the fruit is. Once cool transfer it to sterilized jar. 

Note : You can easily leave the blueberries out for only strawberry version. Also this is not very sweet, it's more of sweet & tangy in taste but if U like more sweeter version U can simply increase the quantity of sugar. For freezing I usually portion it into roughly 2 week supply & fill it into glass bottles and don't fill to the brim, because when it freeze it expands so need extra space otherwise the bottle will crack. I usually fill 3/4 of the bottle.

As I'm writing this post, in my mind I'm planning to make a fresh batch of this preserve in the morning as the one made last week is already finished, little one enjoyed licking it from the plate. So go ahead and try it at least once before the strawberry season slips away.

Wednesday, June 30, 2010

Blueberry Muffins with Orange streusel and Eggless too


Summer means berries, berries & more berries. This Sunday when he got few packs of fresh blueberries, he told me to make blueberry muffins. I have made these quite a few times & we all love these over the regular kind of blueberry muffins. First time when I ate these on one of our road trip I absolutely loved these....moist & nice crumb with lots of blueberry flavor & nice crunch on the top, to me it's perfect. I will prefer these over any other kind of muffins. I have used Orange zest for topping one can easily change it to lemon zest if they like, also if you wish store bought jam(chunkier kind) can be used but I really recommend sparing 10 minutes & making a small batch of jam. Recipe below is for 12 regular size muffins.
What U need :
for muffins
2 cups + 1 Tblsp. unbleached all purpose flour
2 & 1/2 tsp. baking powder
1/2 tsp. salt
1 & 1/4 cup light brown sugar
4 Tblsp.(1/2 stick) unsalted butter, melted
4 Tblsp. veg. oil
1 cup buttermilk(I use 3/4 cup plain dahi/yogurt + 1/4 cup water)
1 tsp. vanilla extract
1/2 cup blueberries rolled in 1 Tblsp. of flour

for jam
1 cup blueberries
3-4 Tblsp. regular sugar

for streusel topping
2 Tblsp. regular sugar
zest of 1 orange

What U do :
1. Make jam
  • Cook blueberries with sugar on med. heat for about 7-10 minutes till u get the jam like consistency. Mash the berries with the back side of the spoon. Use more or less sugar as per your taste & tartness of berries. Let it cool.

2. To make streusel topping mix sugar & zest, keep aside.

3. Make muffins
  • Heat oven to 425 degree F. Prepare muffin tin with non-stick spray or line muffin tin with paper liners.
  • In a large bowl whisk flour+baking powder+salt.
  • In another bowl mix sugar with oil & melted butter. Add buttermilk & vanilla, whisk everything together.
  • Now add wet mix to dry mix & gently mix everything, using a hand whisk. Batter will be thick & might have some lumps, BUT DO NOT OVER MIX.
  • Using a spatula fold in the berries coated with flour.
  • Spoon the batter into muffin tins. Now using a small spoon add some jam to the center of the tin & with the back side of the spoon swirl the batter in the muffin.

  • Lastly sprinkle the streusel topping on the top of muffins & bake them for around 15-18 minutes(mine were done in 15 minutes).

Enjoy these muffins when they are still hot or keep them in the fridge for next morning breakfast or late night snack, warm them in the microwave for about 15-20 seconds or enjoy it cold if you like it that way.

Saturday, November 28, 2009

Here it's called Stuffing, Back Home it was called Bread Poha

Before we move to today's recipe....what is this Fruit or Vegetable ???

Now for the recipe, nope it's not using the produce from the above pic, but it's the recipe from our thanksgiving dinner, something so important that you can't think of having a turkey dinner without it....it's stuffing.

It's typically made with bread croutons, some veggies, nuts & dry fruits. You can either fill the big bird with it (which I don't like) or another popular way is you cook it separately and serve it as side dish (it's called dressing when cooked separately). This time when I cooked bread stuffing, it reminded me of bread poha my Mom makes with lots of veggies & nuts, though it's not exactly same but has many similarities. I ate the leftovers for the next day breakfast & loved it.

Ingredients :

  • 2 cups bread croutons(check notes for making your own)
  • 1/2 cup chopped carrots
  • 1/2 cup chopped celery
  • 1/2 cup chopped granny smith apple
  • 1/4 cup or more roasted & chopped almonds & walnuts
  • 1/4 cup chopped apricots
  • 1/4 cup raisins plus dried cranberries
  • 2 Tblsp. of unsalted butter (or U can use all evoo instead)
  • 2 Tblsp. of evoo(extra virgin olive oil (or you can use all butter instead)
  • 1 Tblsp. of evoo for sauteing the vegetables
  • 1/2 cup of vegetable stock or water ( I used turkey stock)
  • salt as per taste
  • black pepper as per taste
  • 1 tsp. dried parsley

Method :

  1. Heat butter & oil in a big heavy bottom pan. Add bread croutons to it & toss them to get coating of butter. Cook them on a med. heat for about 5-7 minutes, stir them in between. When they start to turn brown, take them out of the pan. If you don't have big pan do it in two batches using 1 spoon of butter & oil each, for each batch of croutons

  2. In the same pan heat 1 Tblsp. of evoo & add celery, carrots & apples. Cover and cook them till they get soft, if needed add little stock or water at a time.

  3. Once the veggies are soft add croutons, nuts & dry fruits. Also add salt, black pepper and parsley. Mix everything & add 1/2 cup of stock/water. cover & cook for couple of minutes.

  4. Turn of the gas. Let it sit for sometime before serving.

  5. This can be served as a side dish or can also be eaten as a snack or breakfast by itself. You can also top it with fresh cilantro(instead of parsley) & sprinkle some lemon/lime juice before serving. If you like you can also add other veggies like peas, bell pepper, green beans etc.. My mom makes bread poha version with some tomatoes in it.

Note : to make your own croutons, take 5 slices of 2-3 day old bread, preferably french bread or any hardy bread. I use whatever kind I have at home. This time I used multi grain bread. Cut the slices into 4 stripes & then further cut each strip into 4 pieces. Spread them onto cookie sheet & toast in the oven 350 degree F for roughly 10 min. or so. Shake them in between, once they turn crispy they are done. Remember if croutons are not crispy stuffing will turn mushy.

For Vegan version instead of butter evoo can be used.

This dish is quite healthy as I used multi grain bread to make croutons plus it has lots of veggies, nuts & dry fruits. Specially with all the other flavours going on kids can't figure out that it has multi grain bread in it(so no complaints). I'm sending this to WYF-Speciality event as I cooked it specially for Thanksgiving dinner and I'm also sending it to Yasmeen's HealthNut Challenge-3 : Healing Foods as it contains all the healthy ingredients from carrots to apples & almonds to cranberries. Last but not the least it goes to Radhika & Sudeshna's Food for 7 stages of life : Kids Event.

And yes, before I sign off did you guys guessed what the name of the fruit in above pic is. It's persimmon, known to the ancient Greeks as "fruits of the Gods". Saw it in the local Chinese farmer market, there were two varieties, one was sold in the pack of 6 or 8 that looked more like round tomatoes. The one I got was sold loose, so I got just one to taste, later checked on the wiki it's called "Hachiya". It was too(when I say too I really mean tooooooo) sweet, pulp inside had similar texture like ripe mango pulp but it was too sweet (we, in fact he only ate one bite, ate it just raw) may be I should have made milk shake with it.

Monday, November 23, 2009

Cranberry Chutney or Sauce - Part 2 also an Update for previous post

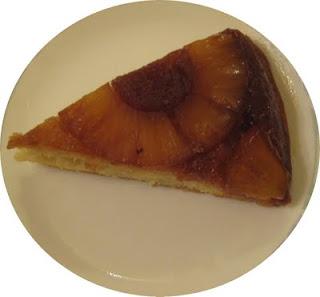
Update on Pineapple upside down Cake : Finally I managed to upload the pics, and also I realized that I didn't took the picture of whole cake, I told you, I love this cake so much that only thing I can think of, while sitting in front of this cake is EATING IT. But I surely got some pictures of the whole process, though they are not very clear, but I wanted to share with you all. Also one more thing DH thinks I used too much sugar for caramel but to me it was perfect specially when eaten with whip cream(point to be noted I made that cake for me, after a long time), so I guess sugar for caramel can be further reduced to 3 tblsp. One more thing I wanted to add for vegan version soy butter can be used instead of regular one.
Now let's come to today's post Cranberry chutney/sauce/salsa or whatever you like to call it.
This is my second cranberry chutney, I think it's more like salsa. As I wrote in my previous post the first chutney I made was good but had lot of sugar b'coz of sourness of berries, so I came up with this more healthy option by adding 2 apples to it(so I can eat as much as I want, without any guilty). Apples I used were quite sweet, so try to use sweet varieties, that way you can cut the sugar out of this recipe.Now, little bit on health benefits of these berries(this info is collected from web), some common ones are :

1) treating UTI(urinary tract infections)
2)reduction of Dental Plague
3)anti-cancer activity
4)reducing the risk of heart disease
5)preventing the development of kidney stones
6) provide relief for asthma patients

Now the recipe.

Ingredients :
  • half med. size onion chopped
  • 2 apples peeled & chopped( i used red delicious)
  • 1/2 lb. fresh cranberries(that's half bag)
  • 1 tblsp. sugar
  • salt as per taste
  • black pepper as per taste(optional)
  • red chilli powder 1 tsp.(can be left out if making for kids)
  • garam masala 1 tsp.
  • ginger 2 tblsp. freshly grated
  • water/apple juice 4 oz. or more
  • little oil

Method :

Heat little oil in a heavy bottom pan, saute onions for 2 min. or so then add rest of the ingredients. At this point only add 4 oz. of water. Mix everything together, cover & let it cook on med. for around 15 min., stir in between.

Add more water according to the consistency you like, I kept this one little loose like salsa kind. Once the apple & cranberries are cooked(they'll be mushy) it's done.

Serve it with with your choice of bread, roti, rice, as chips dip or as a sauce for grilled meat or seafood. I enjoyed it eating just like that, with nothing.So, go and grab these fresh berries before they disappear from store shelfs. As for me, I'm gonna make little extra this time & try to freeze it for later use.

It's very healthy for kids also, with only 1 tblsp. of sugar, which infact can be replaced by honey also. Kids will surely like this fruit sauce, tangy & sweet. I would like to send this recipe to :

1) Radhika & Sudeshna's Food for 7 Stages of Life - Kids(4-14 yrs.) .

2) Yasmeen's Helath Nut Challenge 3 : Healing foods .

3) Sharmi's CFK- Veggies & Fruits.

4) On Sanghi's suggestion I'm sending this cranberry chutney as well as Pineapple upside down cake for her FIL-Fruits event. I'm dedicating the cake to my DD as I love to bake for her, she love cakes and specially after eating this one she said this is the most tasty & soft vanilla cake she ever ate. And as far the cranberry chutney is concerned I dedicate it to my Mom who's the inspiration behind my cooking.

Wednesday, November 11, 2009

Saturday morning breakfast - Homemade Bagels with Apple Peel Chutney

Too much of googling can some time lead you to this.......


I was not exactly looking for Bagels but surfing for one thing easily takes you to other once you are on net, so that's how I ended up making Bagels this weekend. Doesn't need much planning, I just followed the original recipe ,tasted good DD ate with cream cheese but I liked it with some whipped butter & home made Apple Peel chutney. DH gave me 7-8 out of 10 (10 being the best), so I guess I did good as it was my first try.

Bagels taking hot bath(in water) before baking :

I'm not writing the recipe here as I didn't made much changes except that I divided the recipe into half so I got 6 bagels out of it. Another change was instead of all-purpose flour I used bread flour(b'coz I had a big bag of it). As for timings are concerned mine were done in 25 min., I usually keep my timer set for 5 min. less then time asked for, in the recipe, whenever trying something new.
One more thing I rolled & shaped 5 bagels acc. to the direction in the recipe but for one I just made the ball of dough & with finger poked the hole (like you do for vadas), and that one(right one in the bottom pic) came out little smaller in size. So I believe roll & shape process is better to use.

Ready to go in the oven :

It's a food blog so a post without recipe doesn't sound good....here's the recipe for my Home made Apple Peel chutney or as I say by-product of applesauce because I wanted to use peel left after making applesauce, so I came up with this idea.
Ingredient :
  • Peel of 2 apples cut into pieces(I used red delicious)
  • half apple cut into pieces(preferably granny smith but use what ever u have)
  • 3-4 dry red chillies
  • around 2 tsp. of chopped ginger
  • salt as per taste
  • black pepper as per taste
  • 3-4 cloves(loung/lavang)
  • 1/2 tsp. mustard seeds
  • 1 tsp. cinnamon powder
  • juice of half lime(if using granny smith taste the chutney before adding lime juice)
  • apple juice around 1/2 cup(water can be used)
  • little oil

Method :

1) Heat little oil in a pan then add mustard seeds, cloves & red chillies, let them splutter. Now add ginger, apple peel & apple. Sprinkle the salt & cook the mixture on med. heat for roughly 20 min. or so. Keep adding little bit of apple juice whenever you feel it's getting too dry.

2) Once peel & apple become soft add black pepper & cinnamon powder.cook it for a minute or so then turn off the gas & let it cool down a bit(If it's too dry splash little water or juice).


3) Once cool add lime juice and grind it using blender or food processor.


Enjoy the chutney as a side with roti or spread it on your favourite bread/bagel or as a dip. Sorry, no photos we were busy eating & I totally forget to take pic of my bagel with butter & chutney on it.

Monday, October 26, 2009

Homemade Apple Sauce & Awards

An Apple everyday keeps the Doctor away.


Apple is such a fruit that no matter where you go in the world you'll definitely find apples, may be not your favourite variety but some tasty one to munch on. Today's post is about something very simple but yet delicious & very useful. It's homemade Apple Sauce and credit for this recipe goes to my DD, as a baby she never liked applesauce I use to buy for her (ready to eat baby food).

But in her preschool once a month she use to have cooking class, where once they made applesauce, that was the day...... she came home taught me the recipe and...... then onwards she loves it, only thing she make sures once in a while "Mom did you used my recipe?" and answer is "Yes"...... because I never knew before that how to make applesauce at home, sometime there are certain things that they are so simple & easily available that we forget about them, I guess we take them for granted. But that day onwards it's been almost 4 yrs. now I never used store bought applesauce, if I'm in hurry I use microwave but only homemade applesauce please.
I'm sending her delicious & healthy Homemade Apple Sauce suitable for any age (infants 6 months onwards) to Radhika's & Sudeshna's Food For Stages Of Life -Cooking For Infants & Toddlers event.
Ingredients :
  • 4 Apples( preferably sweet kind, I used 3 red delicious & 1 granny smith)
  • 1 teaspoon cinnamon powder
  • pinch of salt
  • 3-4 tblsp. apple juice or water
Method :
1)Peel & core the apples & pears then roughly chop them.
2)Put them in a large microwave safe bowl. Add rest of the ingredients. Microwave them till they get soft about 5 min. on high OR
3)Pressure cook them on med. high, after one whistle turn the gas off & let them stay in the steam.
4)Once cooled check them, they should be mushy when you press them between your fingers.
5)Now you can either puree them finely for babies or using hand blender blend them coarsely for toddlers.
Note : 1)Above mentioned quantity would yield you approximately 2 cups of applesauce, though it totally depends upon the size of apples you use.And you can store it in the fridge for up to 5 days or so. But I prefer to freeze it in small portions, if I'm using it for babies, to maintain the freshness or I make it in small quantities....it's so simple.
2)If apples are little tart I normally add one pear, to balance the tartness of apples but it's totally optional. You can also make various fruit sauces using different fruits available in that season like peaches, plums etc.
There are few other ways to use this sauce:
1)For babies it can be mix with any baby cereal like rice or oats.
2)Can be mixed with plain yogurt & you have flavoured yogurt ready with no extra sugars.
3)It can be used as dip for crackers & hard pretzels.
4)As fat & egg substitute in baking.
Go grab some apples,wash, core & chop them, steam them & enjoy your homemade applesauce.Big thanks to SE of Denufood for passing me my first awards, It's really nice of her, I'm feeling happy, good start to a new week. (Uh...oh...I don't know how to post those awards to my blog & further pass them to the blogs I like to read....got to do some research...may be little help here....someone...please).
Update : I posted this post in the morning but then I thought it would be nice to add some benefits of applesauce. Apple Sauce has a good reputation not only among babies but among every age group for various reasons, it's not only tasty snack but also :
1) It contains many phytonutrients that act as antioxidants.
2) It is a great source of fiber, offering almost 4 g per serving.
3) It is full of many helpful flavonoids as well. Some of these help reduce inflammation in the blood vessels and joints, which helps relieve pain from arthritis and also promotes healthy blood flow.
4) The antioxidants in applesauce helps to prevent many forms of cancer that can be caused by the free radicals they fight.
5) The flavonoids found in applesauce help to protect liver cells.
for more details you can click here.